This week has been a wash out. A complete washout. I haven’t been to work this week because I was in hospital overnight Monday night.
I’ve had a niggling headache for a couple of weeks and it all came to a head on Saturday. I just starting feeling horrible and everything was out of kilter. Then I started losing all the food that I was trying to eat. And it went on throughout the weekend. I didn’t want to worry my family in Manila so I had to keep fairly still when I was chatting to them on Skype so that I wouldn’t feel nauseous. On Monday, I decided to go see the doctor because I still had the headache and I was still throwing up. I thought it was another stomach bug that I’d caught while commuting as the people I travel with on the trains have no sense of infection control.
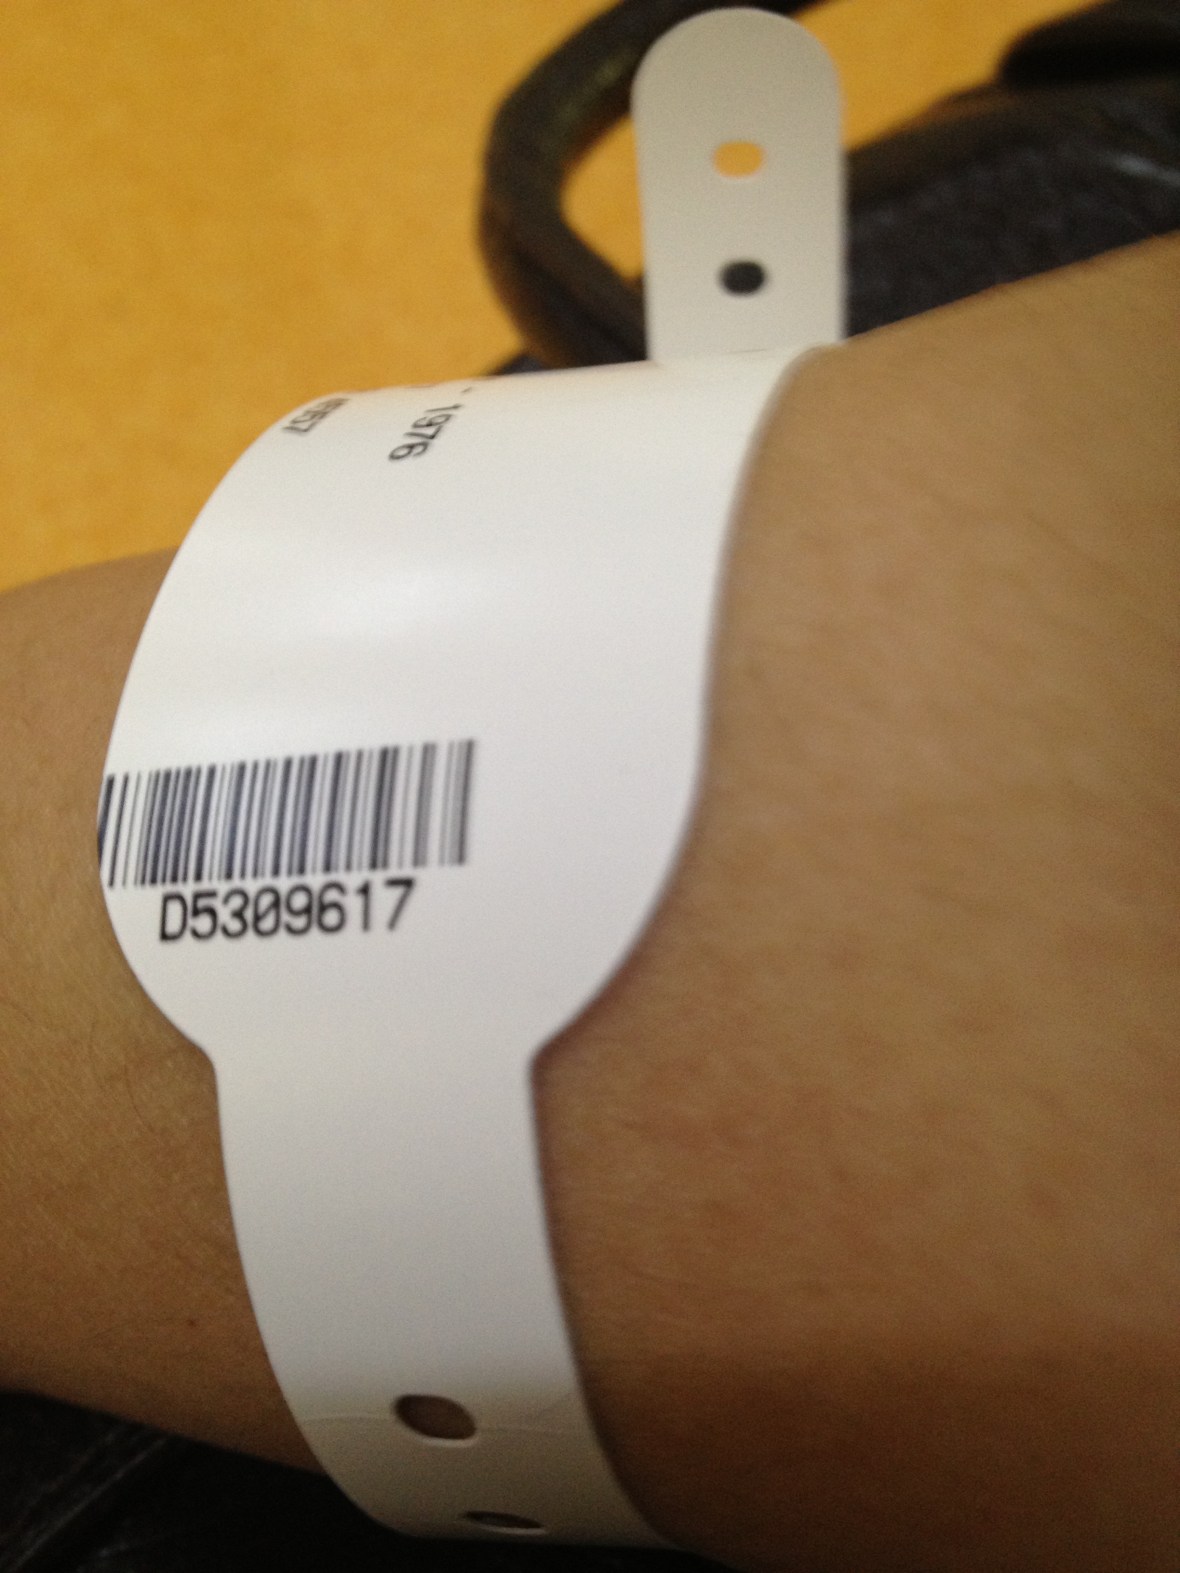
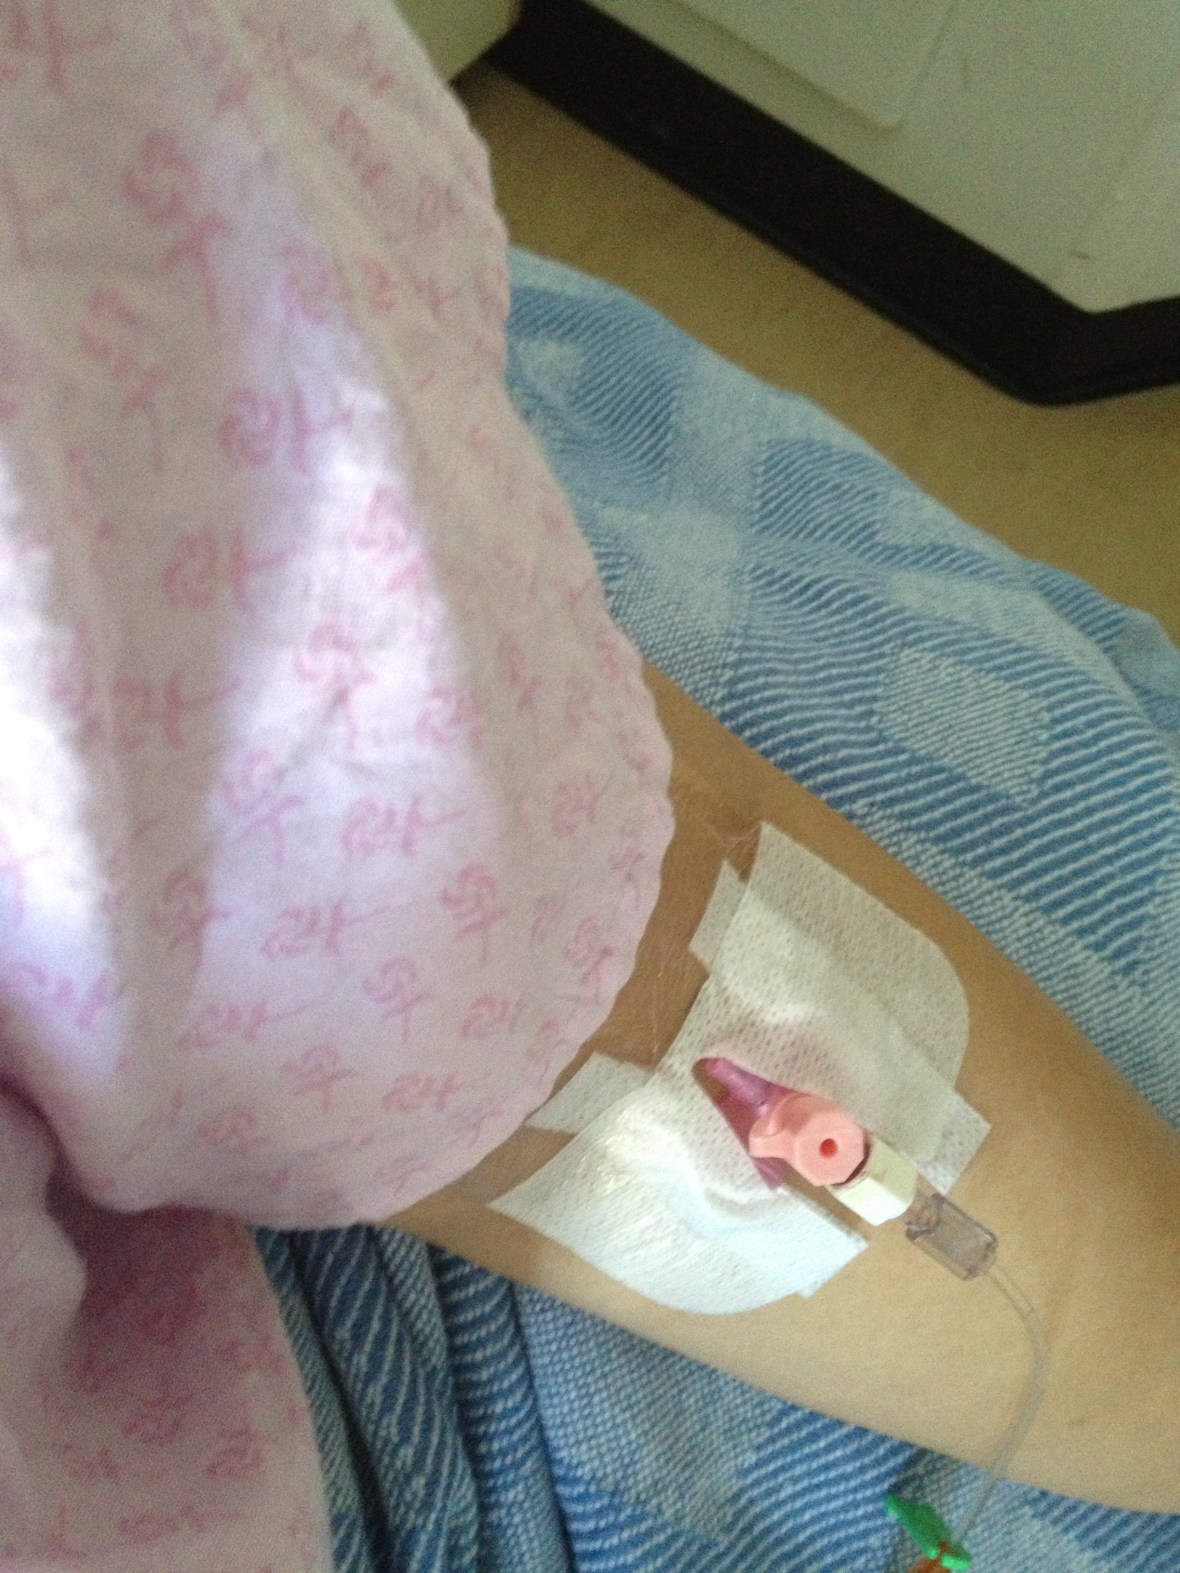
At the doctor’s surgery, I was examined and told that I had to go to the hospital because my blood sugar was sky high and because my symptoms pointed to something more serious. It was slightly worrying because at that point I thought all I had was a bug. So I took myself off to the hospital where I was told that they wanted to keep me overnight for observation. So they popped an IV cannula in my arm to prepare me for what might be an insulin drip or something else. From what I understood from the doctors, they wanted to rule out any neurology problems caused by either a throat or a lung infection, or something else. It was the undiscussed “something else” that I didn’t like. I didn’t like not knowing. The fact that I was asked to do the Romberg test three times was a tiny bit worrying. I only breathed a sigh of relief when the consultant said that my Romberg test showed “nothing of concern”.
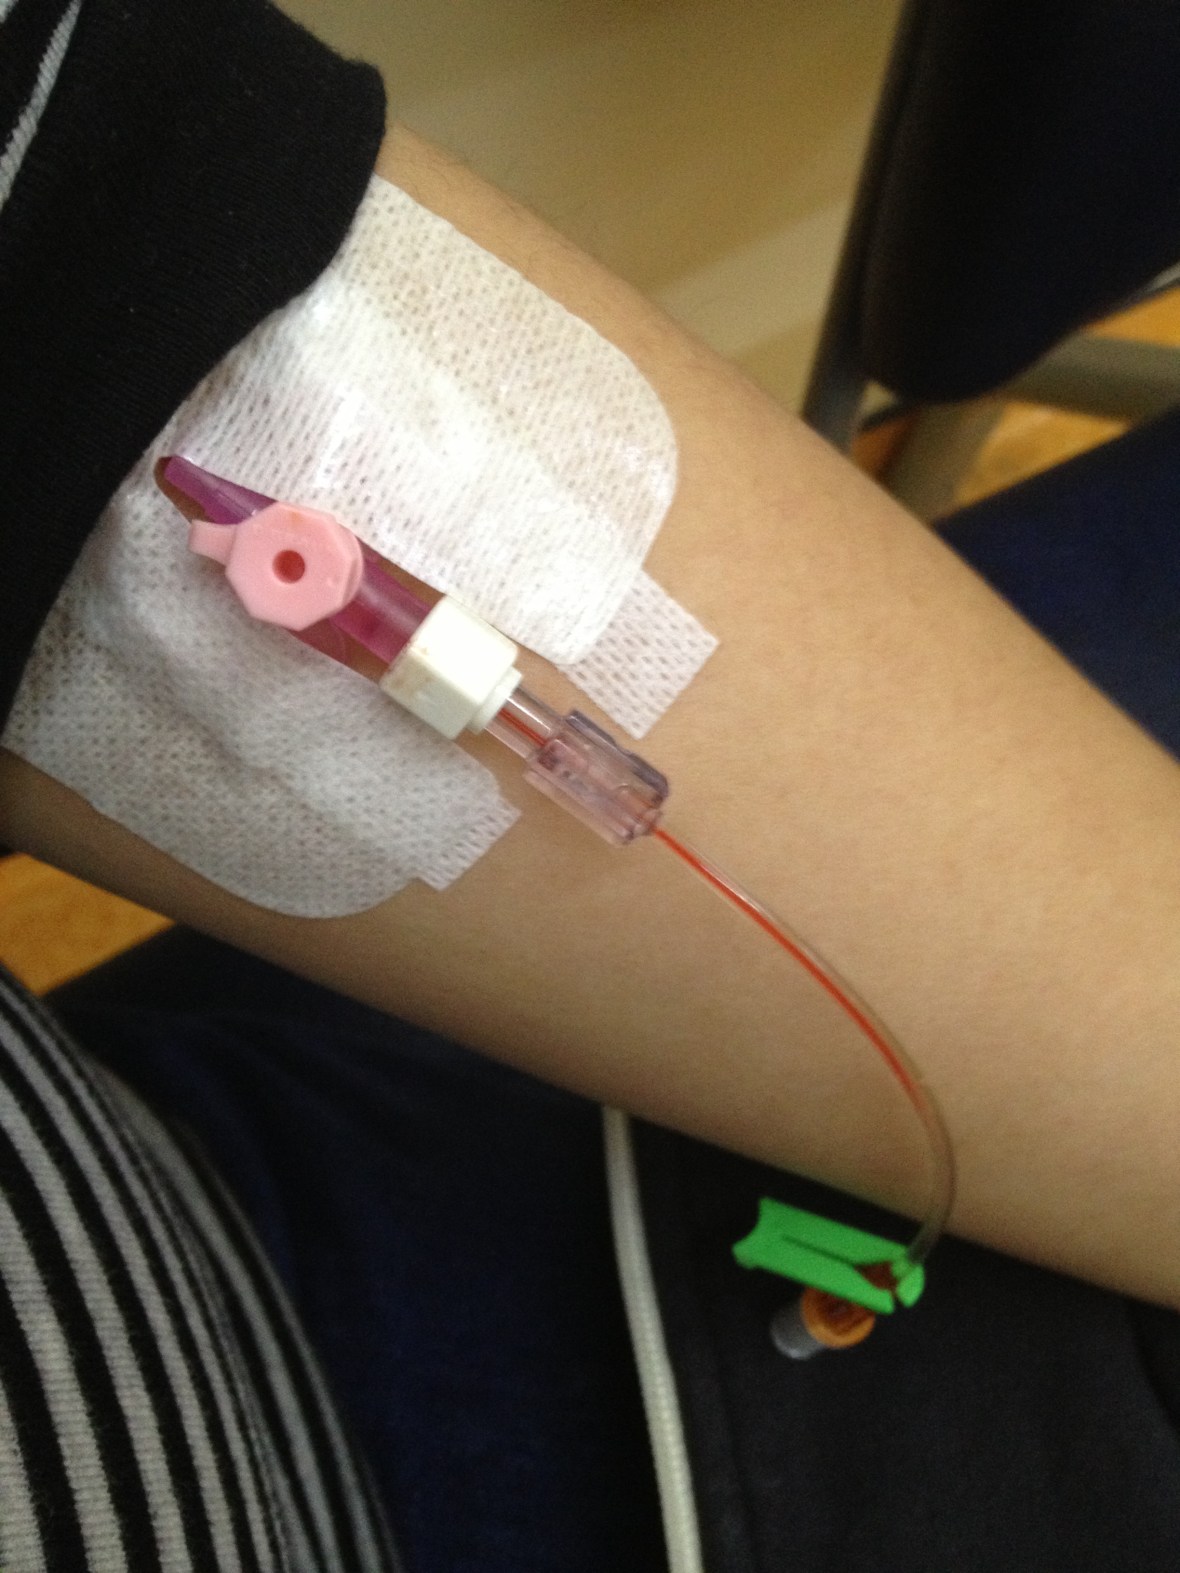
I hate hospitals. It reminds me of illnesses, deaths of family members and my brother being always ill when he was little. But there I was, in NHS haute couture (aka a pink hospital gown that opens in the back), with a cannula (IV needle) stuck in my arm. I felt really sorry for myself because hospitals in the UK are different from hospitals in the Philippines. Hospitals in the Philippines allow for “watchers” to stay with the patient, hospitals in the UK don’t. Mind you, I understand why people aren’t allowed to stay in the hospitals. It all boils down to infection control. So there I was, with a pounding headache, feeling completely sorry for myself and an iPhone that was running out of juice! It was a good thing I had my Kindle with me because otherwise, I would have been bored out of my mind! In hindsight, I found it funny that what I was most worried about was that my iPhone was running out of power. I think, subconsciously, I just didn’t want to think about what was wrong with me.
I know it might sound inconsequential, but one of the reasons I disliked being in hospital was the food. Hospital food is meant to nourish the body and not necessarily ambrosial! I was famished because after tossing my cookies for two days, I, basically, hadn’t eaten anything for days! So the evening I was admitted into hospital, I wasn’t really looking for anything to eat. I did appreciate it when a lady wielding an efficient looking trolley of hot drinks asked if I wanted a cup of tea. There is nothing more comforting than an cup of strong, milky tea! Breakfast was whole wheat toast and a small bowl of bran flakes swimming in milk. Lunch was minced beef, with boiled potates and vegetables with a bowl of rice pudding for dessert. Lunch wasn’t bad, but it wasn’t inspired either, and dessert was just not right for a diabetic because it was overly sweet. Don’t worry, I didn’t have any of it, save the little taste that I had.

I was placed in a ward but was in a side room all by myself. Mind you, I thought that was a good thing because, after I was settled into my room I started bawling my eyes out. There I was, a grown woman, wanting my mummy!
I was told the following day that I could be discharged and that after all the tests and a CT scan, it was only an atypical migraine. My blood sugar skyrocketing was due to the fact that I was throwing up and not keeping my meds in (at least, that’s my theory, and not the medical professionals’!). I still have a headache that comes and goes and I think I may need to see the doctor again because my headache still hasn’t gone completely. Although, that being said, it’s no longer a pounding, head-splitting pain and is more bearable with pain meds.
It was sort of a turning point experience because it made me look at how I’m taking care of myself. I can’t really deny that I am a diabetic and I can’t go on living the way I live. I can’t miss my medicines. I really need to watch what I eat and my excuse that if I eat in moderation whatever I want will no longer work. And I know I can still bake, but I need to bake more savoury things than the sweet things that I enjoy making. I need to take care of myself. I really need to. Otherwise, I will find myself in an even worse predicament than I found myself this week!
What a week it has been!