
Tag: baking
Apple thingmebobs
I’m not quite sure what to call these yet but these are cinnamony apple thingies in shortcrust pastry.
Made with 4 ingredients – brown sugar, cinnamon, apples, and store-bought puff pastry.
I need to do another bake run to make sure I have the timings and temperatures right (they do look a little too singed for my liking). I also need to do something to make sure the flavours are lip-smackingly good!
I will post the recipe as soon as I’m happy with the results So watch this space!

How To Make Almond Buns
I’ve been fairly busy this weekend batch cooking and baking. I’ve made a meat sauce that I’m going to use to make lasagna for tonight’s supper and spaghetti meals for the week. I’ve made my version of my mom’s meatloaf as well. I’m really happy as the fridge is full and I won’t have to think of what to cook for the next few days.
I’ve attempted to make almond buns yesterday after Alan sent me a recipe for almond buns. The recipe looked fairly easy to follow but called for shop bought almond paste. Since I had ground almonds at home, I thought it would be easy to make almond paste at home. I googled recipes and found a relatively straightforward recipe that I thought I’d share with you.
You can opt to use my Chinese Milk Bread recipe, however for buns and loaves, I recommend Hazel’s recipe. I don’t know Hazel (Avellana) personally but I stumbled across her blog whilst I was searching for recipes for cinnamon buns. I was looking for a Cinnabon-like cinnamon bun and this was easy to do and yielded amazing results. I’ve been using the dough recipe for most of my enriched dough endeavours. You can find her recipe by clicking Perfect Cinnamon Buns. I’ve based the ingredients on her list but I’ve used my own (tried and tested) way of creating an enriched dough, which has always worked for me.

I apologise for the lack of photography, I’ll do better next time. My kitchen is a right bomb site! I’ve been overrun by multi-buy purchases (it’s cheaper on Amazon if you buy more than one item!) and I’ve allowed myself to be overwhelmed by an unwillingness to sort out my cupboards (you’ll be pleased to know this is now a work in progress thing and I’ve at least started the process of sorting things out!).
Ingredients:
For the dough:
- 250ml warm milk
- 100g caster sugar
- 2 x 7g sachet of dried, quick action yeast.
- 2 eggs
- 75g butter, melted
- 600g strong white flour
- 1 tsp salt
For the almond paste:
- 250g ground almonds
- 150g granulated sugar
- 75ml water
- 75g unsalted butter
- 2 tsp almond extract (optional)
Directions:
- In a heatproof (microwaveable) container, place the milk and sugar and mix until the sugar is combined with the milk. Place in the microwave and heat up for about 30 seconds until slightly warm to the touch. This can also be done on the stove, but make sure that the milk doesn’t catch at the bottom of the pan. NB If you are doing the pan method, make sure you keep stirring. Remember you want the milk to be just warm. Once the milk and sugar mixture has been warmed, add the 2 sachets of yeast and mix well. Set aside in a warm place to allow the yeast to activate. It should take about 10 to 15 minutes. I usually place mine in my airing cupboard or if in a pinch a lukewarm oven (of course, switched off).
- Whilst waiting for the yeast to activate, you can make the almond paste. In a small pan, combine the water and the granulated sugar. While stirring constantly, bring the mixture to a slow simmer. Make sure you don’t take your eye off the sugar-water mix as it can burn quickly if unattended. Once all the sugar is melted and the mixture is clear (you should be able to see the bottom of the pan), take the pan off the heat and stir in the butter. Mix until the butter has completely melted and stir in the almond extract if using. Add the ground almonds and mix until well combined. The more you mix the paste, the smoother it gets. I like the coarseness of the ground almonds but if you want a smoother paste, you can use a stick blender until you get to the consistency you prefer. Set aside and allow to cool.
- Mix the flour and salt in a bowl and set aside (do not refrigerate as you don’t want the paste to harden).
- You’ll know the yeast has activated when the bubbles are almost as much as the liquid. In a mixing bowl, mix the melted butter and the 2 eggs until well-combined. Pour in the yeast and milk mixture and mix well. Add the flour and mix until well combined. I use a free standing mixer and I beat the dough until it comes away from the sides. Of course, if you don’t have a mixer this can all be done by hand. Once the dough was mixed well, turn out the dough on a floured surface and knead the dough until it’s smooth and elastic. If the dough feels wet and sticky, sprinkle a little flour over the surface and the dough and knead. It should take about 10 minutes of kneading, if doing it by hand and about 4 to 5 minutes if doing this via the mixer. Once all combined pour about 1 tbsp of oil in the mixing bowl and place the dough in the oil, making sure the dough is well oiled. Cover the top of the bowl with cling film or a towel and place in a warm place to let the dough proof and rise. Leave for about an hour.
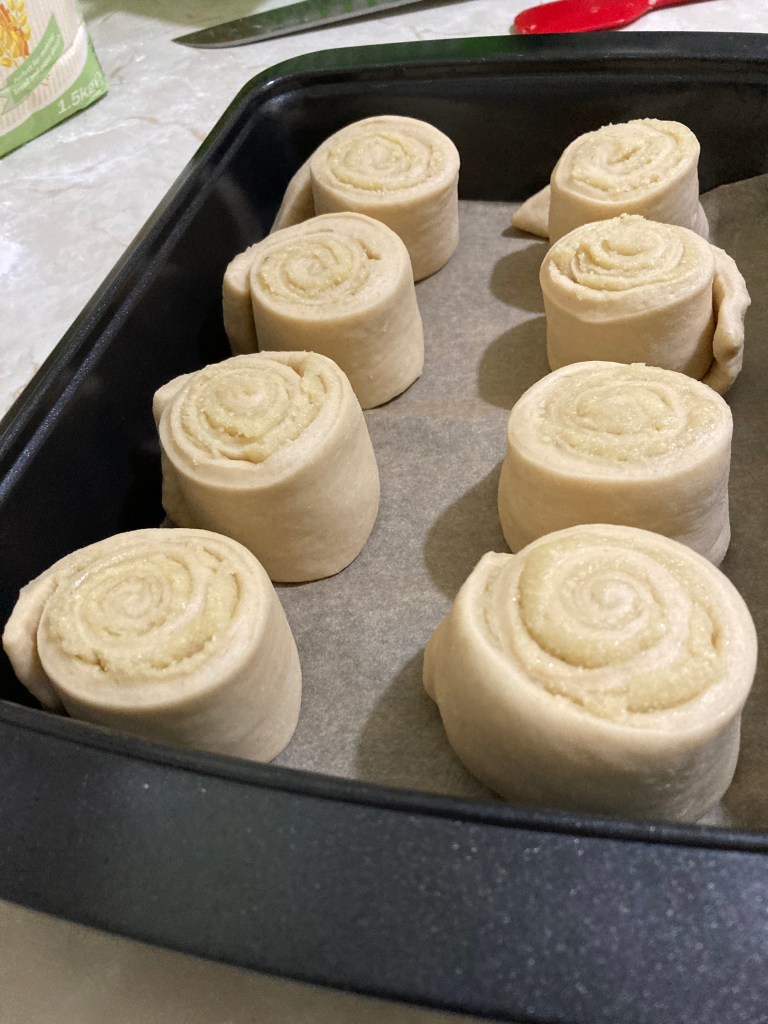
- Check on the dough after an hour. It should be about twice the size of the original ball of dough. If it is still slightly smaller, allow for another 30 minutes to an hour. Once the dough is risen, whilst still in the bowl, punch the dough several times to release the air and deflate the dough. Turn out into a floured surface and knead until smooth. With a rolling pin, roll out the dough to a rough rectangle of about 24 inches (60cm) in length and about 12 inches (30cm) in width.
- Once you have your sheet, spread the cooled almond paste all over the dough, leaving about an inch at the bottom of the sheet. Roll the dough down towards you as tightly as you can and with a sharp knife, cut your buns from the long stick. This should make about 16 buns.
- Place the buns in a wax paper-lined (greaseproof) tray or large flat baking dish, about 2 inches apart, and allow to prove for another hour. After the second proof, the dough should rise and grow to twice the size.
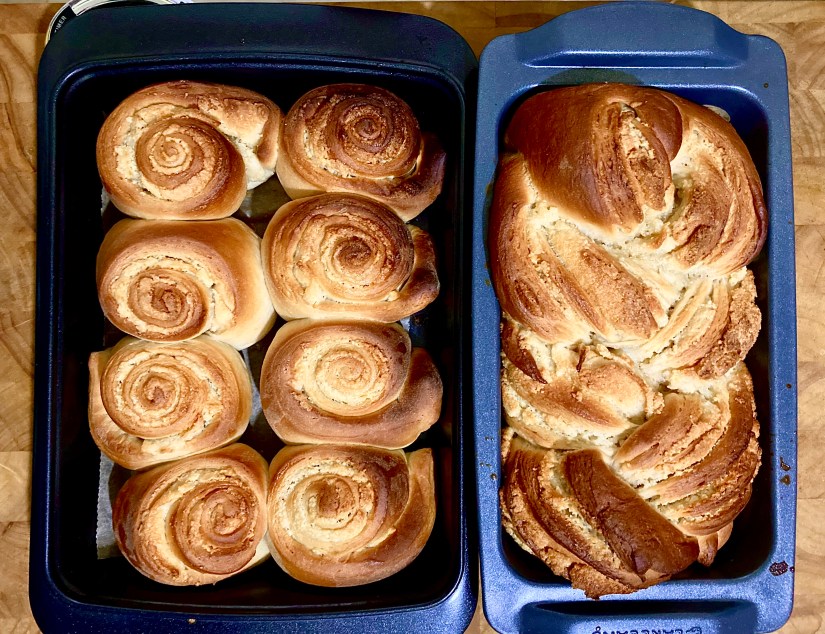
- Preheat the oven to 180C. While waiting for the oven to heat, mix 50ml of milk and 2 heaping tablespoons of confectioners (icing) sugar, brush this all over the buns. You can also use an egg wash (beat 1 egg and brush over the buns). Place in the oven and bake for 18 to 20 minutes (sometimes even up to 22), depending on the oven. The buns should turn golden brown and rise some more. Once they are lovely and golden, take theam out of the oven. Allow to cool on the baking tin for 15 minutes before moving it to cooling racks.
- This is optional as it means adding more sugar, but if you’d like to add a glaze, mix 50ml milk, 4 heaping tablespoons of confectioners sugar and 1 teaspoon of almond extract and combine until smooth and lump free. Drizzle over the buns. Serve and enjoy!

Top tip: The recipe is quite substatial, so I decided to create buns and a plait loaf. But if you decide that you’d rather have buns, this makes 16 generously sized soft filled buns.
Almond cookies!
I love baking traybake bakes because of the ease that they present. You mix the batter and you spread them on a greased and prepared pans, pop them in the oven, wait for the appropriate time, et voila! You have cake!

However, that being said, I do love the care and attention that’s required when making cookies, or as the Brits call them, biscuits. I love the drop cookies and the cookies that require a bit more care and precision and a cookie cutter. It’s the care and attention that is involved in making each biscuit that counts. Each piece is individual.
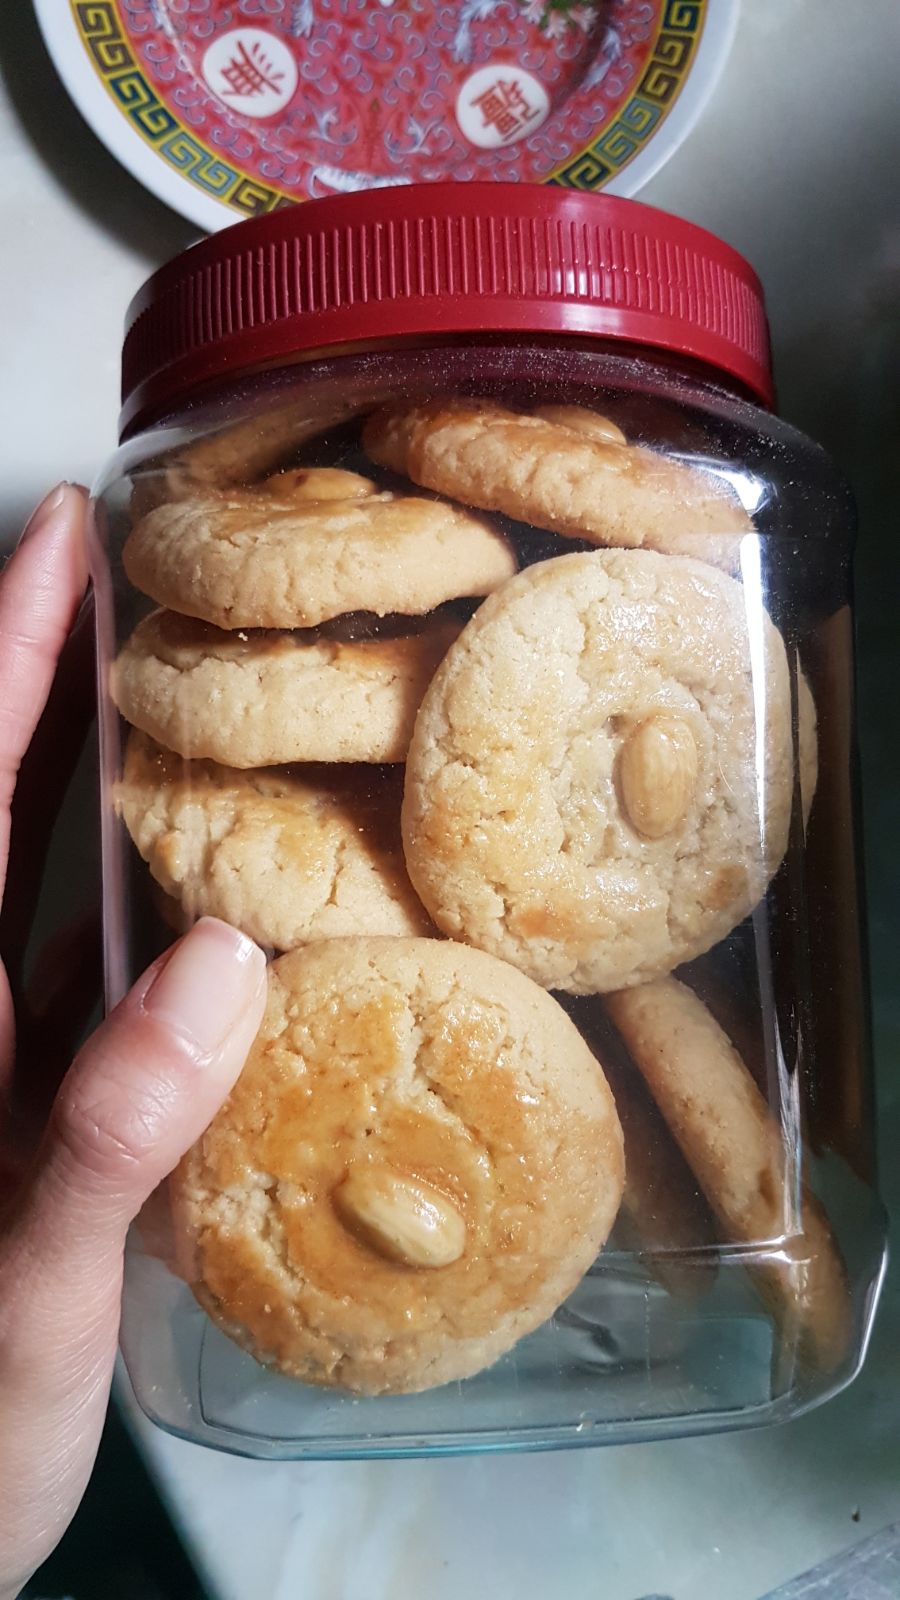
One of my favourite cookies to bake (and eat) are almond cookies. These cookies are Chinese bakery staples and most of my Chinese friends have a happy childhood memory involving an almond cookie. So when Alan found a recipe and we perfected the recipe and cookie production, it became a staple for us.
Sure, it’s a little more complicated than mixing the batter and dolloping them on a cookie sheet, but it’s the process that makes it special. Because every time you scoop the mixture, press the almond into the centre and brush egg wash on each cookie, you are putting a little piece of you in the cookie. Too sentimental? Okay, here’s the recipe instead!
Ingredients:
- 125g unsalted butter
- 170g caster sugar
- 1 egg
- 200g plain flour
- ½ tsp baking powder
- ½ tsp salt
- ½ tsp almond extract
- 150g ground almonds
- 24 blanched almonds
- 1 egg (beaten for brushing)
Directions:
- Preheat the oven to 180°C. Cream together the butter, sugar and salt. Then add the almond extract and egg, and mix well. Slowly add the flour, the baking powder and ground almonds and make sure it is all combined.
- Line a couple of baking trays with baking paper and then divide the mixture into 24 equal sized balls. I use a small ice cream scooper to the balls uniform. Lay the balls out on the baking trays and use a round measuring spoon to press an indentation in the middle of the ball. This will also flatten the ball into a cookie shape. If you do not have a round measuring spoon, flatten the ball with your hand and indent with your thumb. Place a blanched almond into the indentation of each cookie and then brush with egg.
- Place into the oven for 12-14 minutes or until the cookies are lightly golden. Allow cookies to cool down for 10 minutes. Reduce the oven to 150°C.
- Brush the cookies with more beaten egg. Bake for 10-15 minutes or until they turn golden. Allow to cool completely and store in an airtight container.
- This recipe makes approximately 24 cookies. If you’re not making halal versions, you can also add about 1 generous tablespoon of Amaretto liqueur to make it even more almondy.
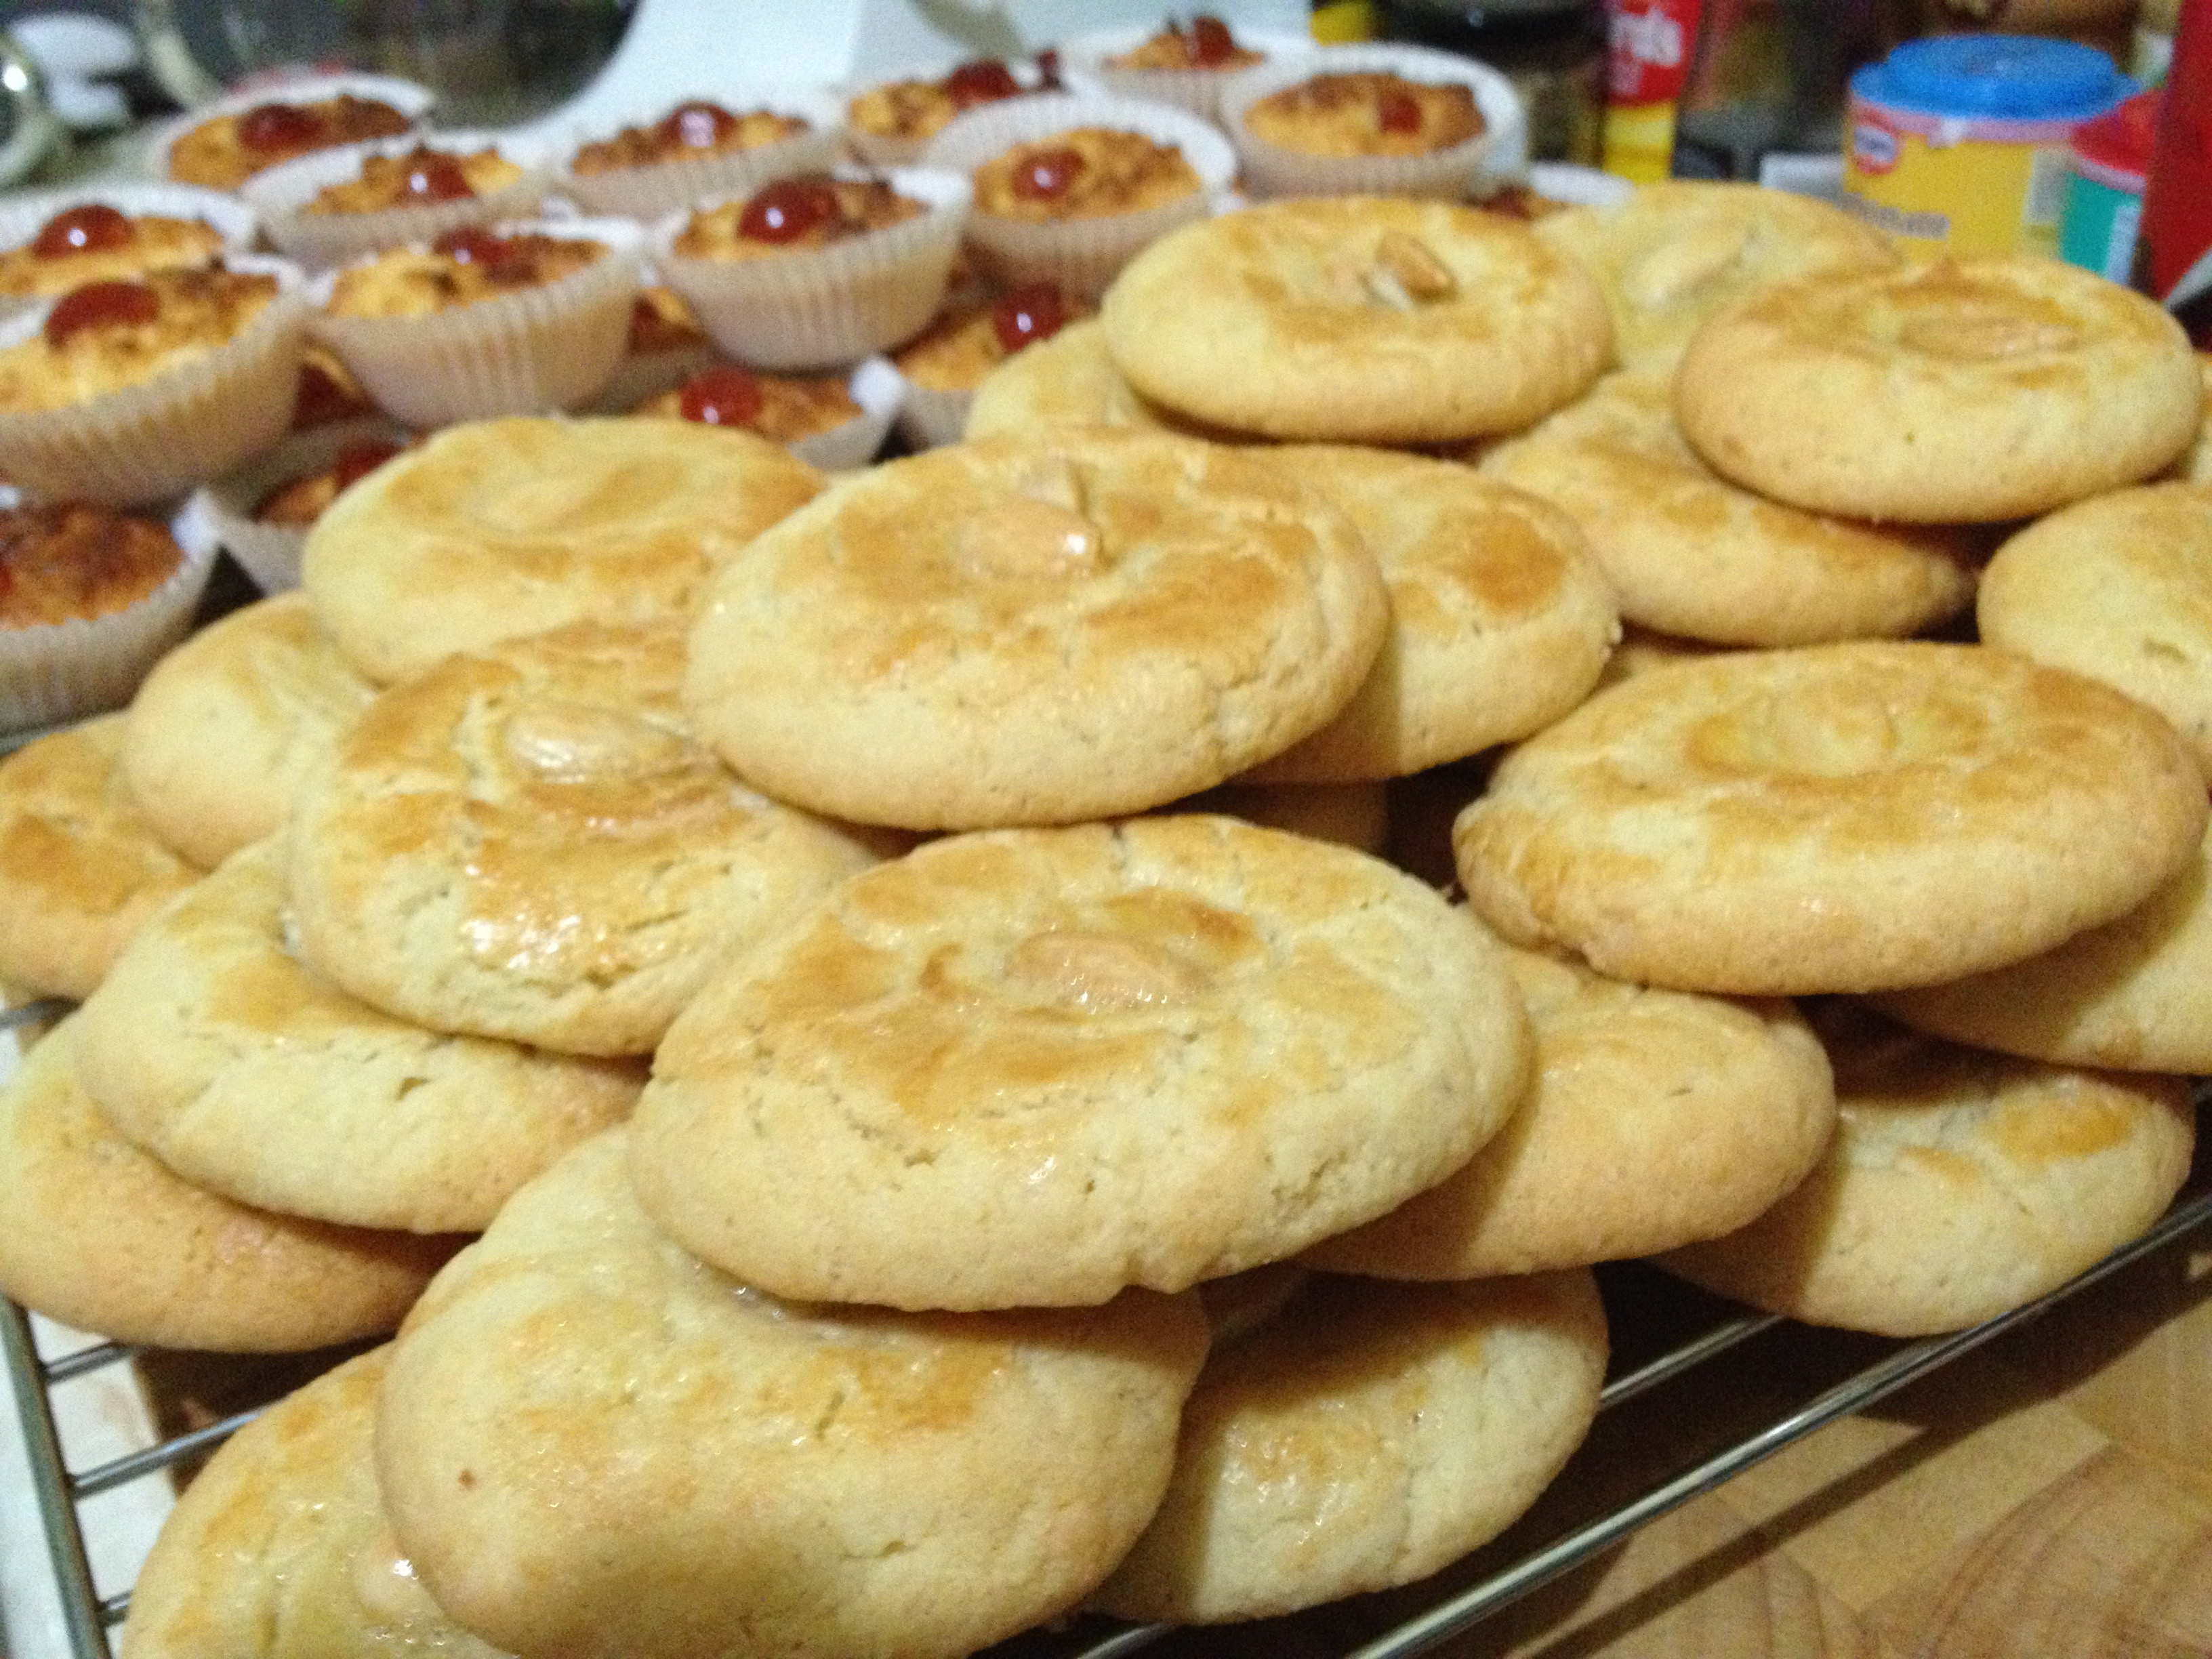
Thank you to Yuki (she’s @the_yukistar on Instagram. Have a look at her photos, they are blow-you-away amazing!) for the lovely photos of the almond cookies! She made them look extra pretty!💖
Blondies

I’ve always loved blondies but they’re not necessarily not something you see in most bakery stalls because it is more often overlookby it’s more popular cousin, the chocolate brownie.
This is my recipe for these gorgeous morsels.
Ingredients:
- 225g good white chocolate, chopped
- 125g butter, cubed
- 4 large eggs
- 300g caster sugar
- 2 tsp vanila
- 160g plain flour
- 150g ground almonds
- 2 tsp vanilla extract
Directions:
- Preheat oven to 170ºC.
- In a heatproof bowl place the cubed butter, and the chopped white chocolate. Place the bowl over slow boiling water, making sure that the water doesn’t touch the bottom of your bowl. Allow the butter and chocolate to melt slowly, stirring it occasionally. Once in a while, lift your bowl off the heat, rest on a towel and stir to help the chocolate to melt along with the butter. This stops the butter-white chocolate mixture from getting too hot and the mixture won’t become grainy. Once the white chocolate has completely melted, left the bowl from the heat and set aside to cool slightly.
- While the butter-white chocolate mixture is cooling, measure out the ground almonds and flour and mix with a balloon whisk to make sure they are well-combined. Set aside.
- Beat the eggs and sugar until smooth, thick, moussey and a very pale yellow colour . I use a free standing mixer and this usually takes about 10 minutes on medium speed. It will take about 15-20 minutes if you’re doing this by hand (depending on your forearm muscle strength and endurance!). Add the vanilla and mix for a few seconds to make sure the vanilla is completely incorporated.
- Add your almond-flour mixture in three parts, each time making sure everything is mixed thoroughly before adding more of the dry ingredients.
- Pour the batter into a tray bake tin foil or a rectangular pan (about 20×30 cm) that has been greased and lined with baking parchment. Bake for 35-40 minutes in the preheated oven (this varies because of how hot your oven can actually get), until the top becomes firm and shiny and when tested and a toothpick or skewer is inserted in the centre of the bake and comes out clean (sometimes with a few sticky crumbs sticking to it). Remove from the oven and allow to cool for 10 minutes (about 5 minutes during a cold winter!). Once cool, gently lift from the pan and place on a cooling rack and allow the bake to get cold.
- Depending on how greedy you are, you can slice this into 18 to 24 squares.
Variations to flavours:
- Raspberry and rose blondies – instead of the vanilla, add 3 tablespoons of rosewater to the eggs and sugar mixture (step 4). Wash your raspberries and dry thoroughly and roll them in flour. The number of raspberries you add will be equal to how many blondie slices you want, i.e. for 24 slices, you add 24, etc. Add 50g more of flour to your almond-flour mixture because the more fruit you want, the wetter the bake. Bake for an extra 10 minutes, making sure you cover the top with foil when it browns too quickly.
- Cardamom blondies – add 3 teaspoons of ground cardamom to the flour and almond mixture (step 3), instead of adding vanilla.
Let me know how you get on with the recipe or suggested variations and leave a comment please!
So I baked a cake!
I’ve always loved giving gifts. I won’t usually settle for just a gift card (unless they ask for it specifically) because I like knowing that when the person rips open the wrapping paper and opens the box, the gift is something they know was made or purchased especially with them in mind. I also love gift-wrapping presents. I need to make the present look pretty, even if it’s just a present plonked into a gift bag – I have to have tissue wrapping in the gift bag!
Lately, I’ve taken to baking my gifts to friends. I like to think my skill as a baker has moved forward and my bakes are delicious and decadent enough for people to feel special they received cake or pastry baked by me.
I baked a chocolate Guinness cake and cupcakes for a birthday celebration that we attended during the weekend. It was a get-together we had planned with our Filipino friends ages ago to celebrate the July birthdays and the early August birthday.

I needed to test frosting colours to so I made extra cupcakes to try the colours out. I was trying for a marbled effect but it didn’t quite work for the cupcakes so I’ll have to look at more YouTube videos and figure out a better technique for the particular effect I was going for. It was a good thing my batch did 2 dozen cupcakes. The leftover batter filled about 9 mini bundt pans but they stuck to the cake moulds so they stayed home.
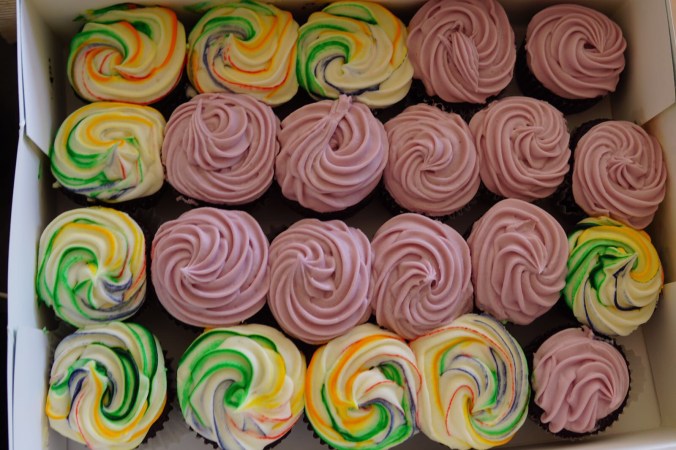
I iced 22 cupcakes (mostly because that was what fit in the box!). With the disaster that were the rainbow marble cupcakes (they mostly looked very Rastafarian!) I tried for a fuschia-y pink shade but the first try turned out more lavender than pink (it kind of suited because some of the birthday celebrators went to Mayfield Lavender Fields on a day trip to take fabulous pictures). I knew where I went wrong but daren’t add more food colouring because I didn’t want the frosting to taste too artificial!
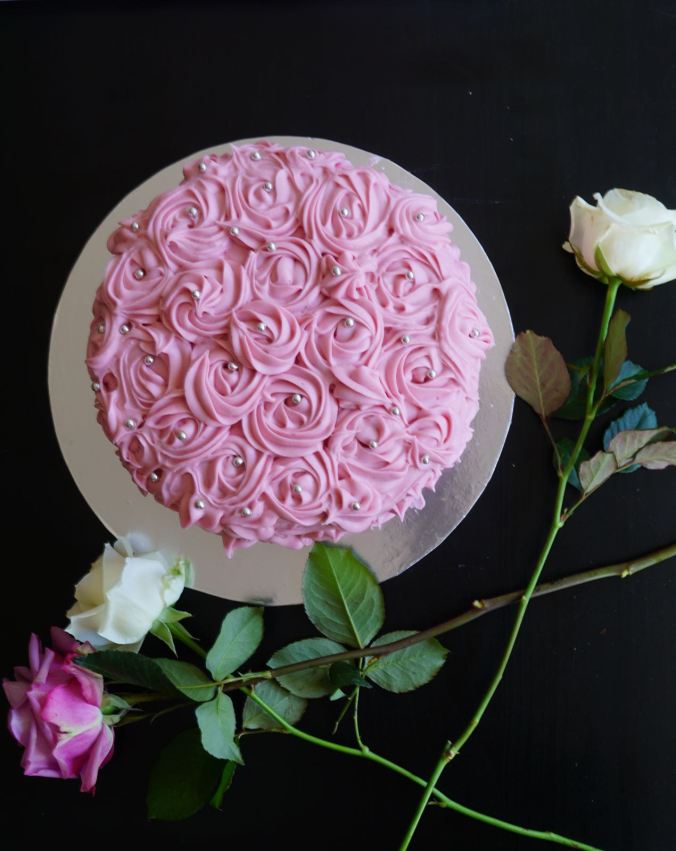
I was quite pleased with the way my large cake came out. It was very detail-heavy because it had swirly roses, piping all around it and silver dragèe balls. Once I finished icing the cake, I moved it to the box I was going to carry it in and OH MY GOODNESS! It was quite a substantial weight. I think I weighed over 2.5 kg!
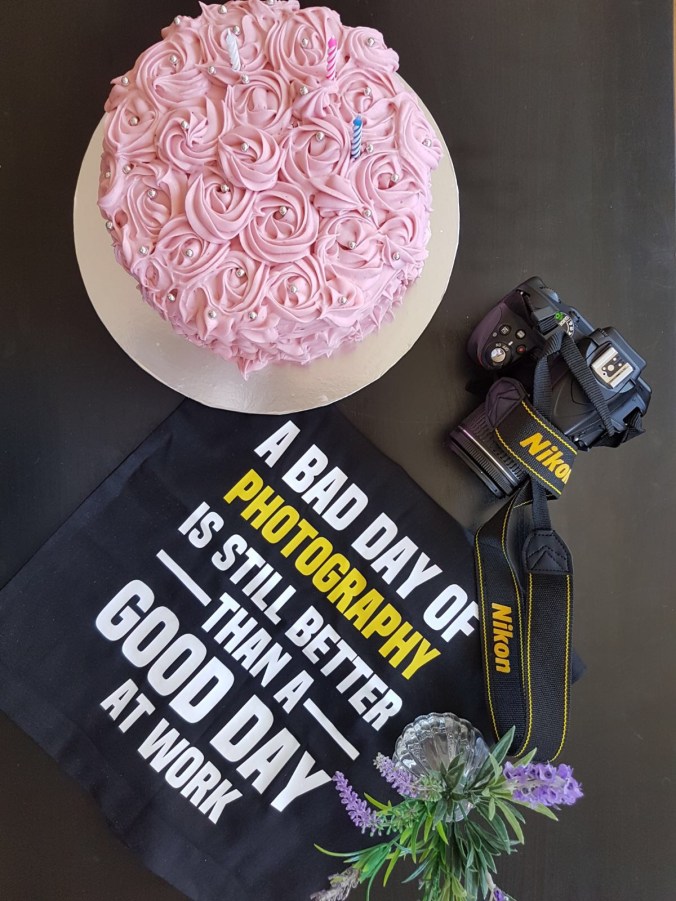
I was pleased that my friends and Alan loved their cake. They loved the flavours and the loved the cake enough to take photos and style the cake before they shot the photographs. Thank you, thank you, thank you for posting your photos on Instagram. I’m so…tickled pink (Sorry! It had to be said!)!

I might be on to a good thing!
*Thank you to @mutyyyaaa and @chic.wanders.in for letting me use their photos of the cakes on this blog post. Mucho appreciated guys! Love you!❤️
This cake happened today!
I bought a bowl of plums from the Friday Market for £1 last week with the intention of consuming them purely for my 5-a-day. Usually the fruit that I get from that particular market stall is sweet and perfect (yes, really!) but surprisingly, these plums were very tart. I tried eating the fruit but it was REALLY tart (bordering on acidic sourness).
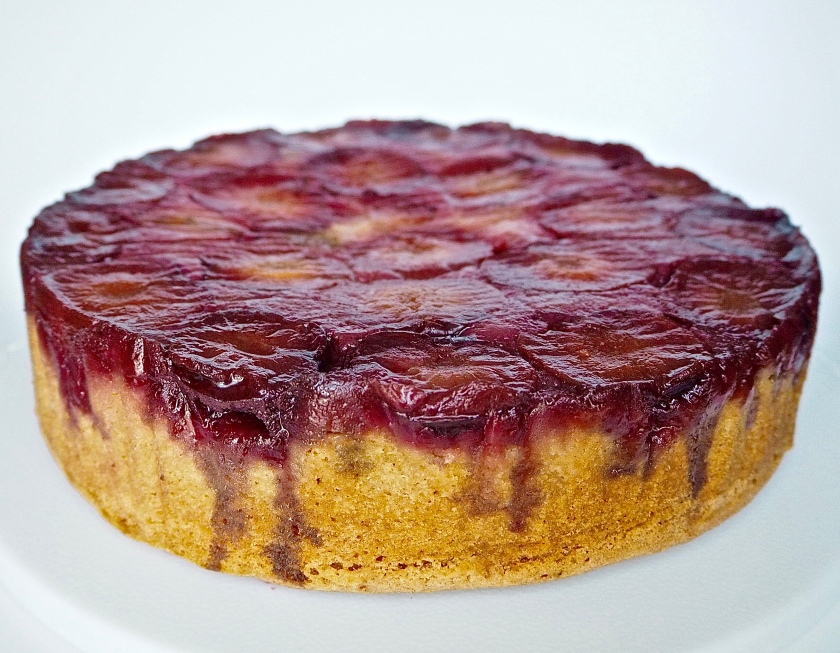 I have written a draft of the recipe for the plum cake. But I need to work on it because the plums were still so tart even after laying them on a carpet of brown sugar. I’ll have to tweak the recipe first and make it a few times to make sure it’s a recipe that works. I promise to share it as soon as I’m satisfied.
Watch this space!
Chocolate crinkles
Over a week ago, I gave in to the urge to finally make chocolate crinkles. It’s a popular cookie in the Philippines. It’s rich, indulgent and fudgy. It’s something that might just make you go mmmmm. I approached the idea of making crinkles with a little trepidation. I always worry that my memories of what things taste like in Manila is different from reality. But I did manage to work up the courage to finally make crinkles!
 I’ve written a recipe that I’ve tweaked below and I know that it works. I would love for y’all to make chocolate crinkles and let me know if the recipe works for you.
Ingredients:
- 150g unsweetened cocoa powder
- 280g caster sugar
- 150ml vegetable oil
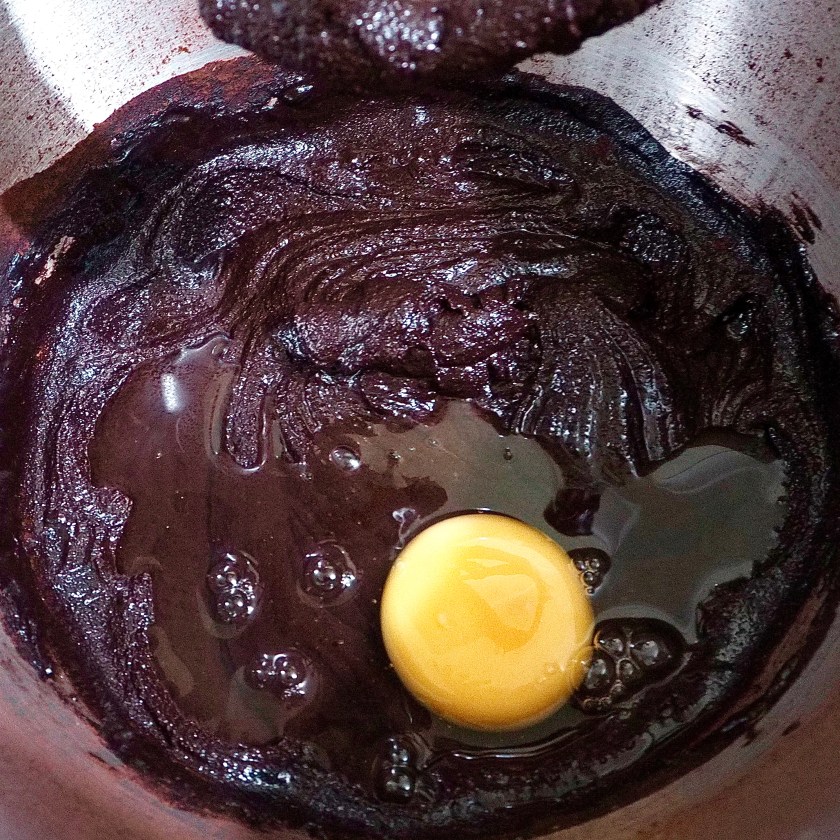
- 4 large eggs
- 2 teaspoons vanilla extract
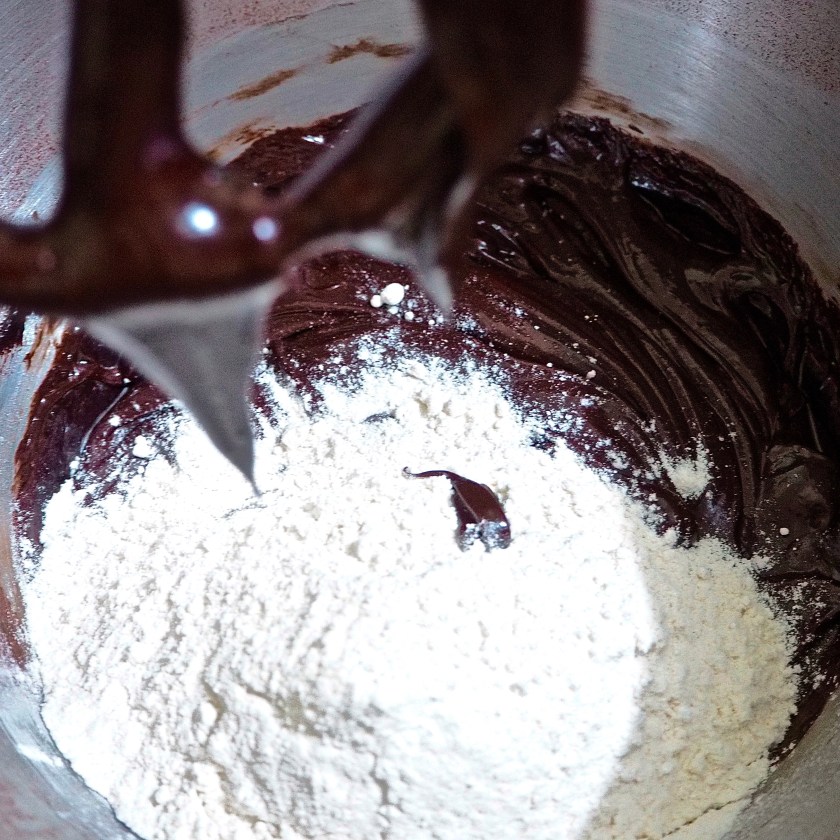
- 300g plain flour
- 2 teaspoons baking powder
- ½ salt
- 150g icing sugar
Directions:
In a bowl, using a balloon whisk, mix the flour, salt and baking powder together and set aside. In a mixing bowl, combine the cocoa powder, sugar and oil. To mix, I’ll use a free-standing mixer.
 With a paddle attachment, on the lowest setting (just so that the cocoa powder doesn’t fly all over the place), start mixing the cocoa powder, sugar and oil for about 2 minutes. Once the mixture forms a thick paste, increase the speed and mix for a further 2 minutes. The mixture should turn shiny and smooth. Add each egg individually and mix until the mixture is again shiny. Once all the eggs are added, add the vanilla.
 Add the flour mixture and mix until well-incorporated and the mixture is smooth.
 Cover the mixture and chill in the fridge for at least 2½ hours (I initially only chilled it for 1½ hours and it seemed to be okay), the longer you chill it, the better.
 Preheat the oven to 175°C (350°F). Line your baking sheets with parchment paper. I like to use a small ice cream scoop or a 1 tablespoon measuring spoon.
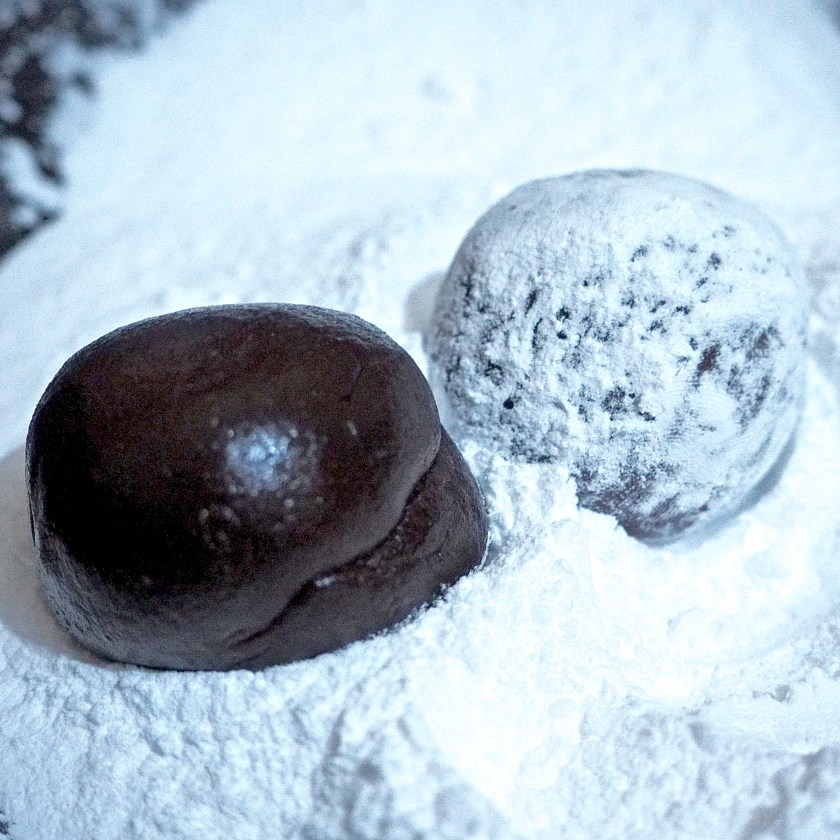
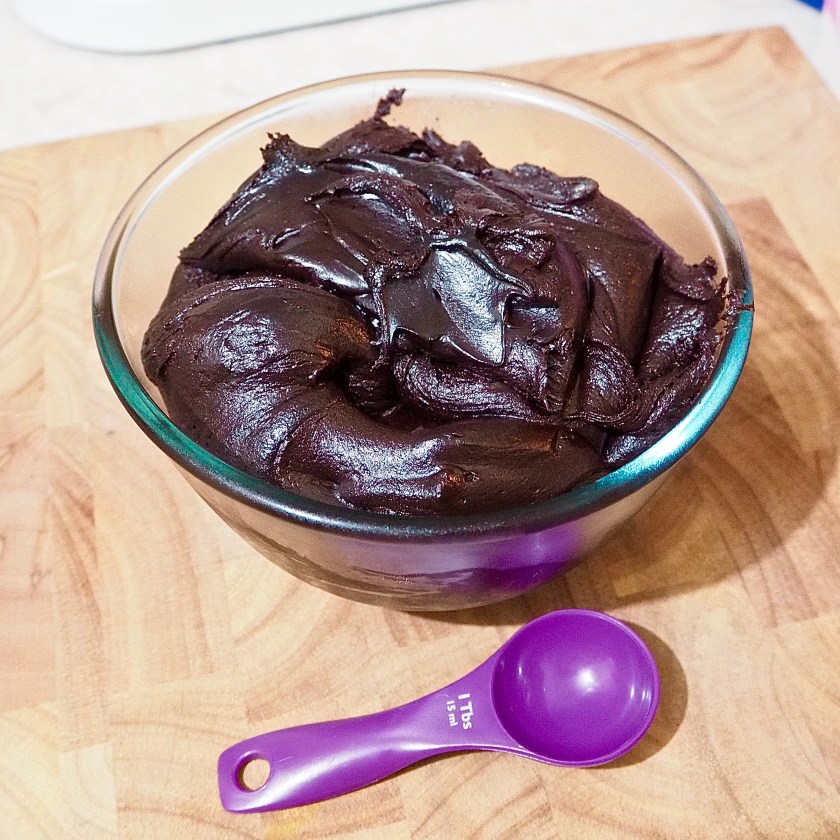 Scoop a generous 1 tablespoon of the mixture and roll it into a ball. Coat each ball with icing sugar and place on the lined sheet.
 Bake for 10-12 minutes. Once the cookies are baked, take them out of the oven and allow to cool on the sheets for about 5 minutes before transferring them onto a wire rack to cool completely.
 The cookies have a recognisable cracked surface and that’s how you know it’s a chocolate crinkle!
 This recipe makes about 40 crinkles.
The power of the crinkle
I comfort eat. Now I know psychologists and nutritionists and every healthcare professional reading this will be gasping and tutting and shaking their head right now. Comfort eating is a terrible coping mechanism and will have far reaching consequences. Ha! How highfalluting and technical-sounding is that sentence, eh? Mind you, I am very aware my comfort eating has allowed me to balloon and gain a whole child in terms of weight since I moved to the UK.
Apart from the comfort eating, I’ve been comfort cooking and comfort baking. I’ve been trying to recreate in my kitchen the food that was readily available to me in the Philippines. My favourite English proverb (which helps me justify my kitchen sessions) is: “Necessity is the mother of invention.” Mind you, the food that I produce in my kitchen aren’t necessarily my own inventions. Sometimes it’s a result of me trawling the internet for tips on how to cook Filipino food. Since Filipino food isn’t readily available to take away or to buy at the nearest convenience store, I’ve got to learn how to make things myself if I miss eating them. I’m quite pleased that I’m able to make things that I would normally just go out and buy if I was in the Philippines.
I finally gave in to a long-standing baking to-do: making chocolate crinkles. Chocolate crinkles will feature in most Filipinos’ top 10 list of their favourite cookies. I’m not entirely certain whether it is a Filipino invention but it is certainly readily available in the Philippines, everywhere. Say the phrase “chocolate crinkles” to a Filipino and you more often than not will hear them say “Awww chocolate crinkles!”
For those of you who don’t know, chocolate crinkles are soft, fudgy chocolate cookies that are slightly firm, almost crispy, on the outside and moist and cakey on the inside. It’s covered with a generous coating of icing sugar outside and when you bite into the cookie, it’s rich and indulgent.
I’m going to share the recipe here once I’ve tried another test run, just to make sure that the recipe works properly. Any taste testers available?
Fruitcake oatmeal cookies
I was craving cookies.
I knew I had enough ingredients in the cupboard to whip up drop cookies. I leafed through my cookbooks for inspiration and decided on oatmeal raisin cookies as the recipe from the Hummingbird Bakery Cookbook was making my tummy growl in anticipation! I started to get the ingredients together and found a bag with about with still a third of the mixed dried fruit and peel languishing in my baking supplies basket. So instead of following the recipe in the cookbook, I improvised and put together what I call a cupboard cookie recipe – because you’re basically using ingredients you find in your cupboard!
Ingredients:
- 135g unsalted butter, room temperature and softened
- 80g soft brown sugar
- 80g caster sugar
- 1 egg
- 1 teaspoon vanilla extract
- 190g plain flour
- 80g oatmeal (I used wholegrain rolled oats, but quick cooking oats work too)
- 1 heaping teaspoon cinnamon
- ½ teaspoon salt
- ½ teaspoon bicarbonate of soda (baking soda)
- 110g of mixed dried fruit and peel
- 70g ground almonds, optional
Directions:
- Preheat the oven to 170°C
- In a bowl, mix flour, oats, dried fruit, salt, bicarbonate of soda, cinnamon and ground almonds (if using), until well-incorporated.
- Because my hands get tired really quickly, I now, more often than not use a mixer, but this can be done by hand (it’ll just take a lot of elbow power) first with a pastry blender (which I will always call a pastry cutter) and then with a balloon whisk. Cream the butter and sugars until the mixture is smooth and a light brown colour. Add the egg and the vanilla and mix until well-combined.
- Add the flour and dried fruit mixture to the sugar and butter mixture until combined and you can no longer see the flour.
- Drop batter, a heaping tablespoon at a time, onto a lined baking tray (Useful tip: if you’d like more uniform-sized cookies, use an ice-cream scooper. I use a 45mm one.). Make sure the cookies are evenly spaced. I bake 6 cookies per tray.
- Bake in the preheated oven for 11-13 minutes. Remove from the oven and allow to sit in the baking tray for about 5 minutes and then transfer to a wire rack to cool completely.
- Makes 24 cookies.

