Yelly Eats

Cooking it slow and low!

My favourite American food shows are Man vs Food and Diners, Drive-ins and Dives.  Mainly because it gives me a lot of cooking ideas.  I think these 2 shows are entirely to blame for a phase I went through over  a year ago.  Mind you, I’m really glad that I went through this phase because I learned how to cook meats using a dry rub and I have my own recipe for a dry rub now.  I also learned the benefits of cooking meats low and slow – cooking them at a low temperature (about 130°C – 150°C) very slowly (at least 5 hours!).  This is excellent proof that good (and very tasty) things come to those who are patient!

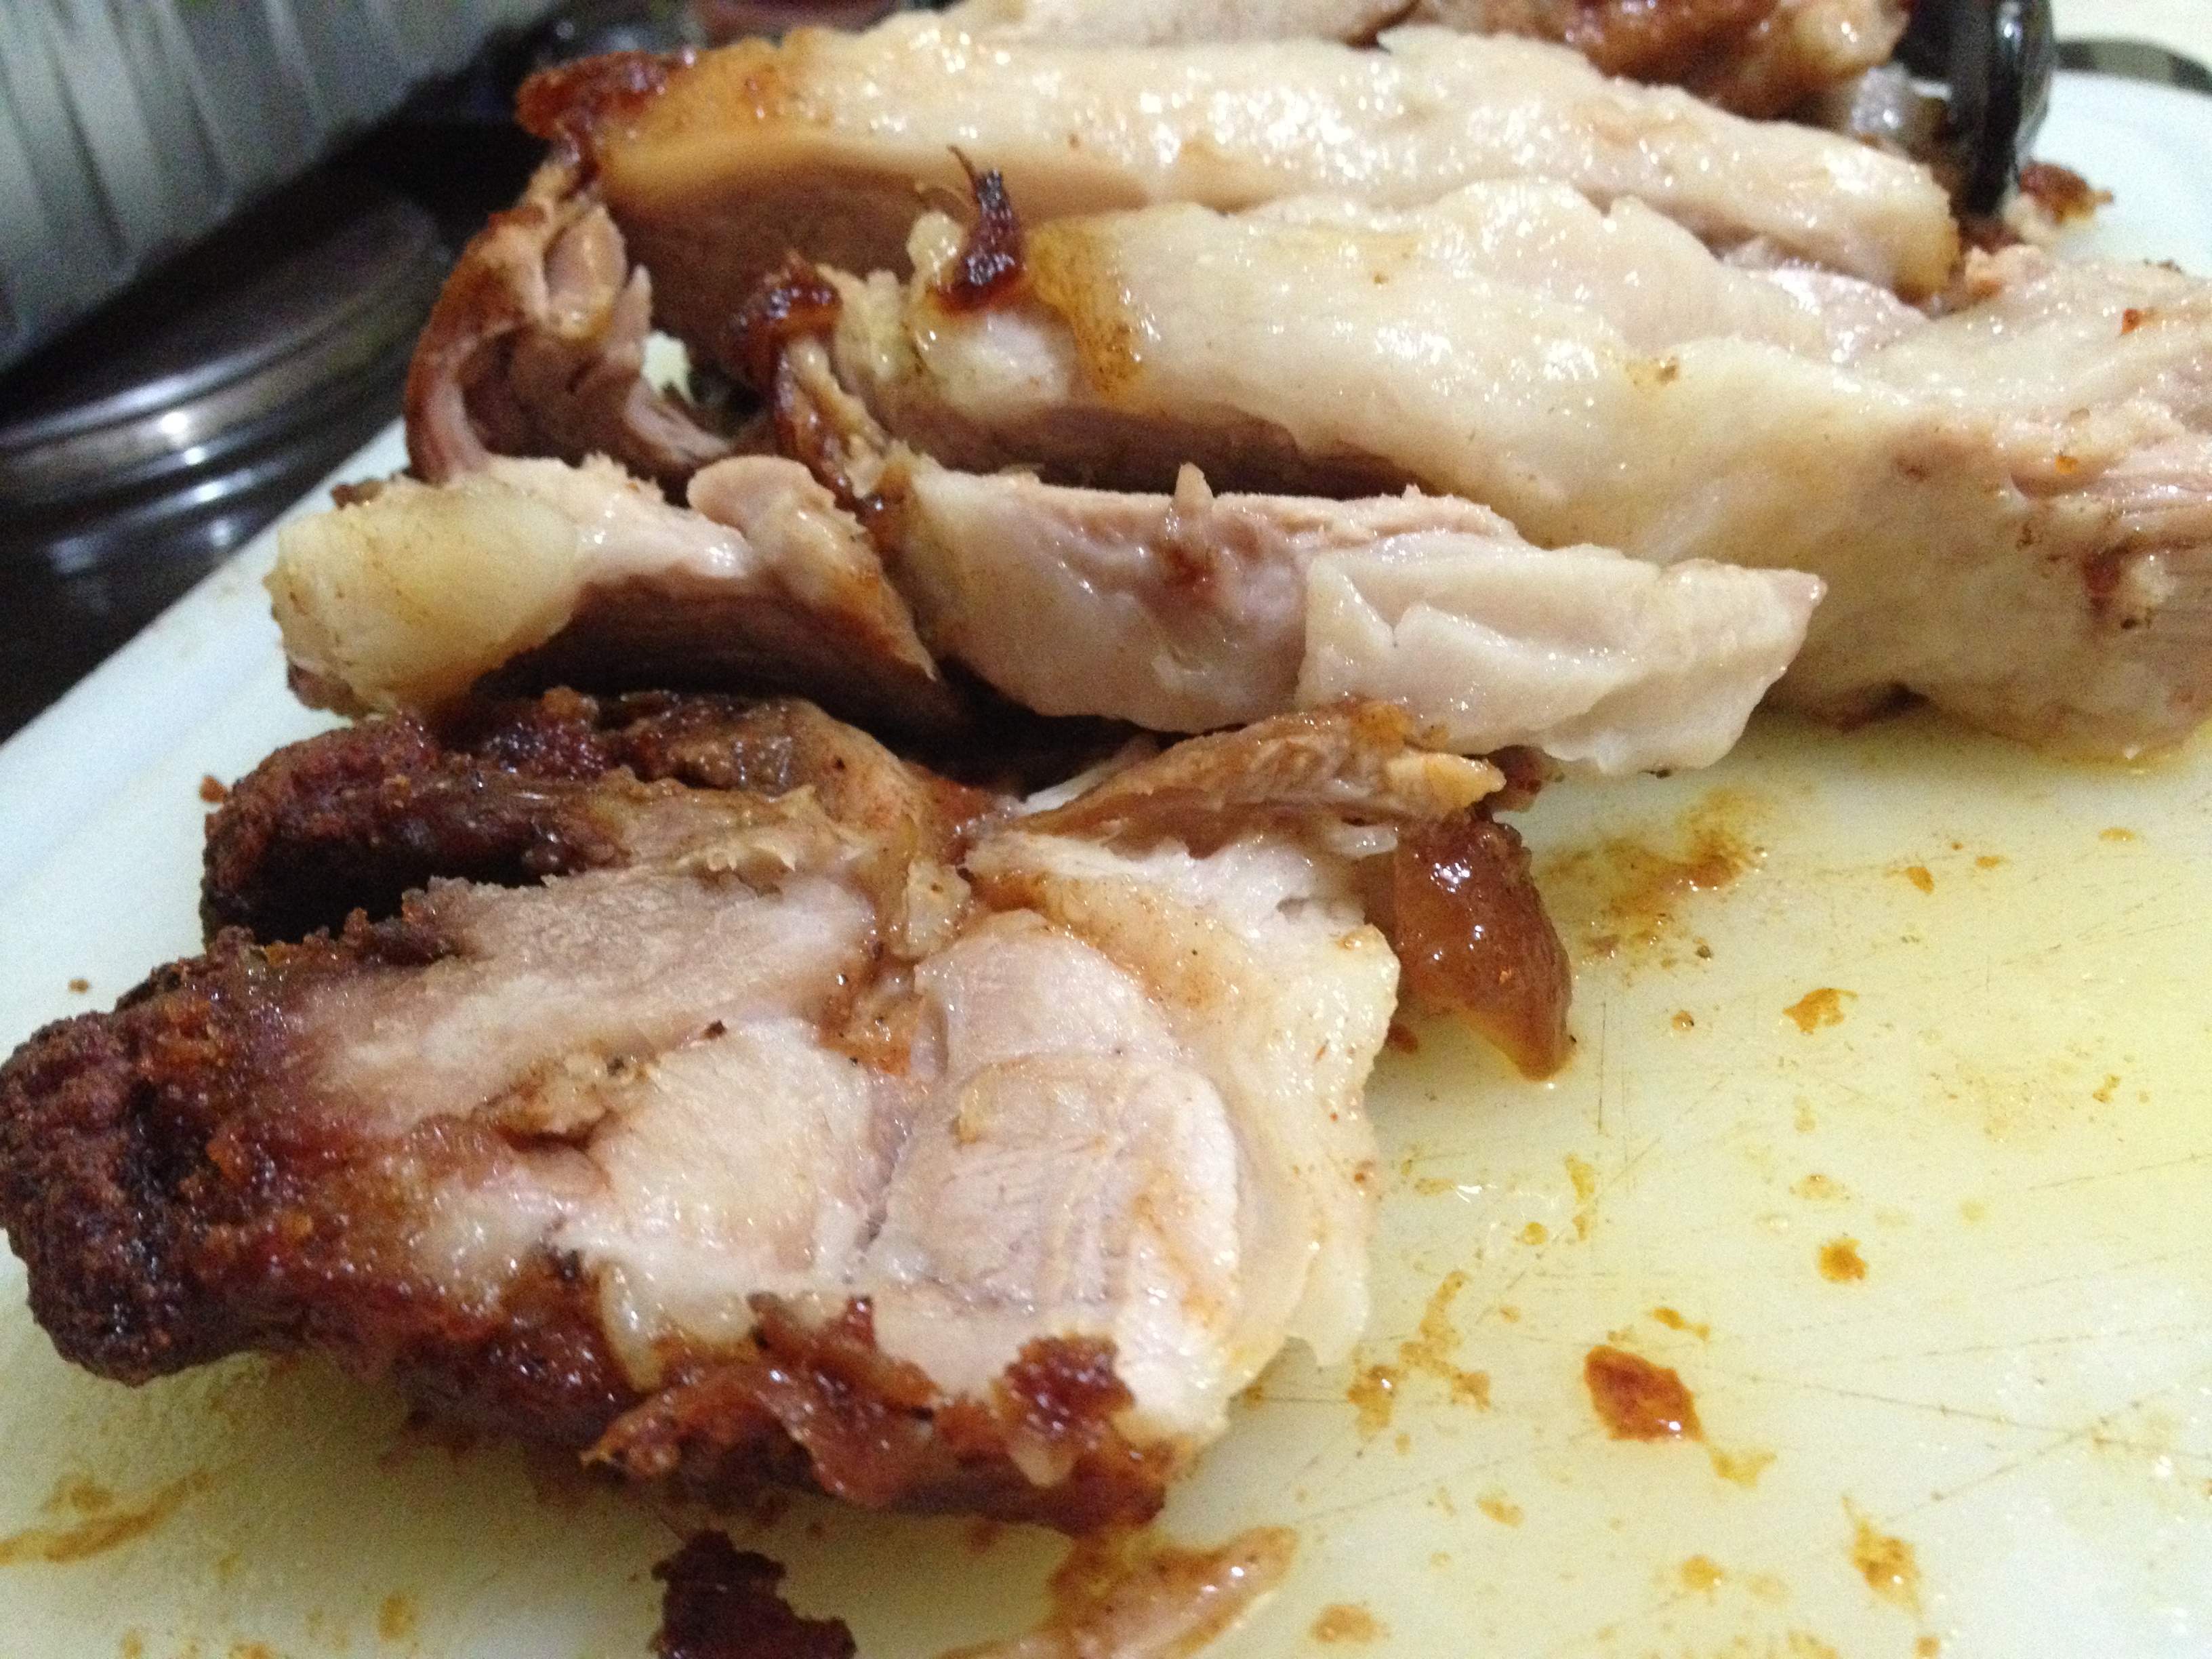
Tonight, I dusted off my dry rub recipe (which is based on the Kentucky dry rub recipe) and cooked the pork shoulder that I bought yesterday (pork shoulder cuts were 50% off so I couldn’t resist buying it–I am a willing slave to food bargains!).  The recipe below will work for meats weighing between 1.75 – 2 kilograms and will work with pork and beef.

Ingredients:SlowroastPork1

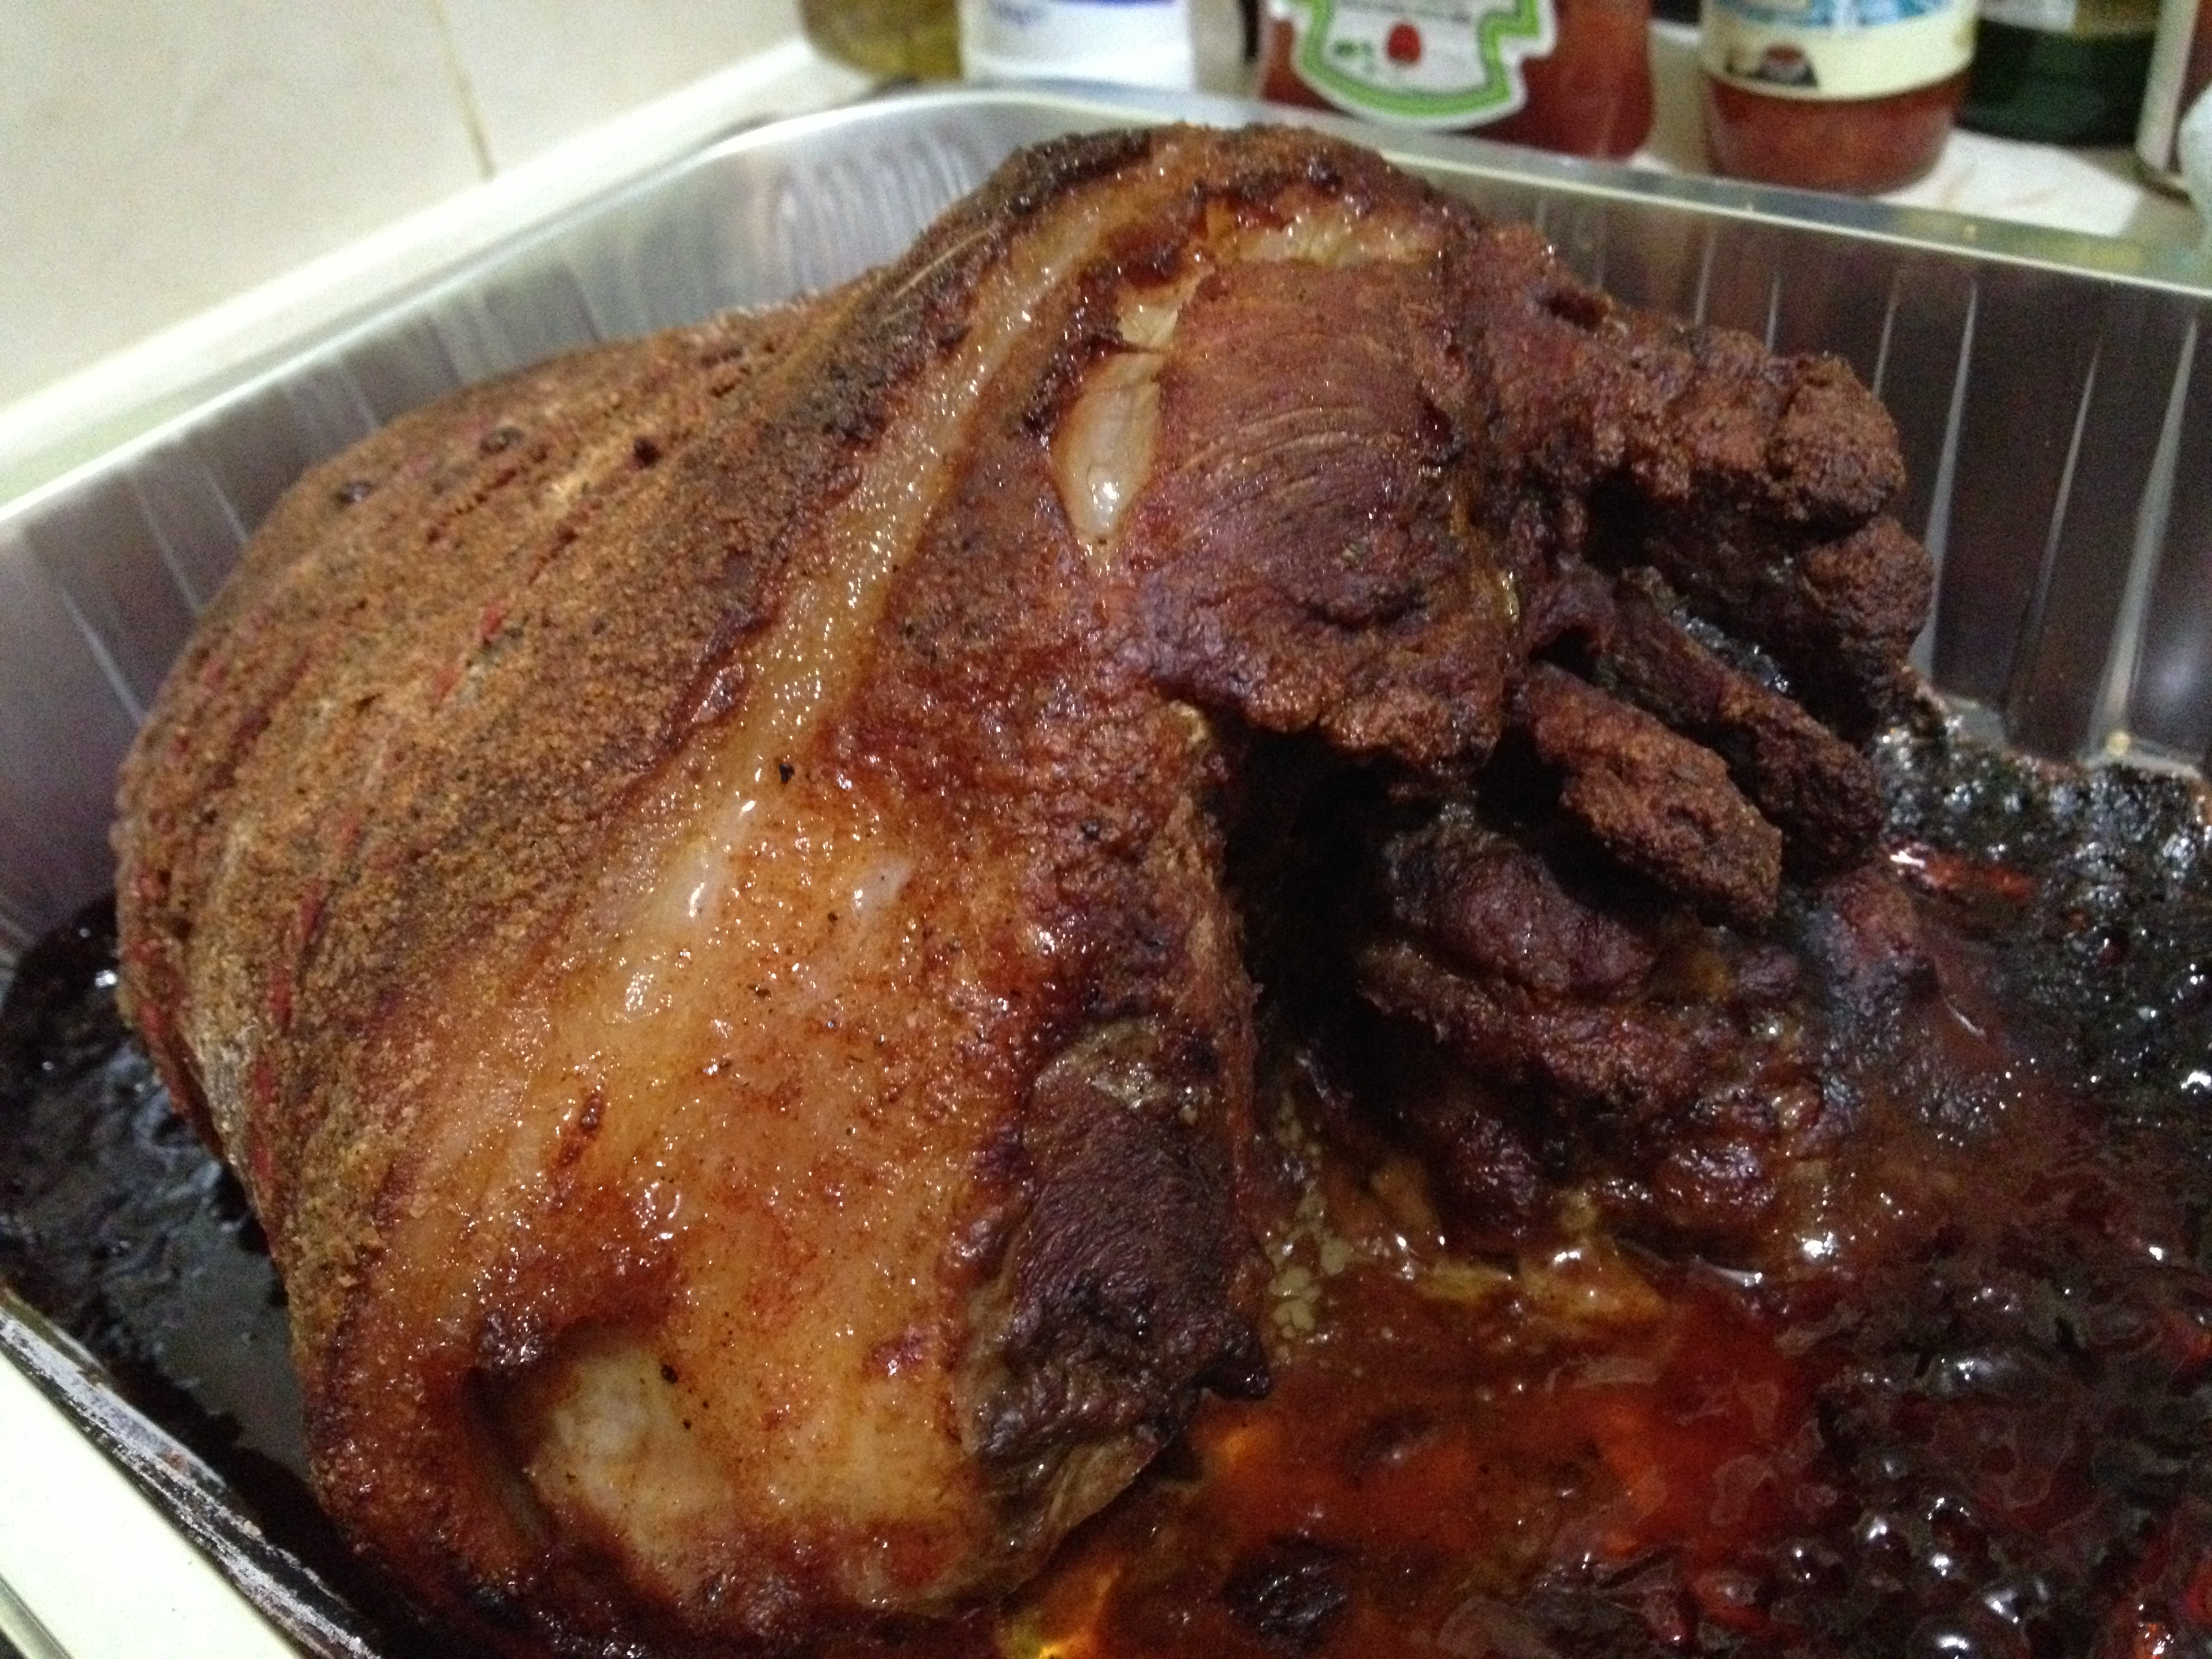
  • 2 tablespoon cornflour
  • 1-2 teaspoons chili powder
  • 2 teaspoons salt
  • 2 teaspoons paprika
  • 4 tablespoons sugar
  • 3/4 teaspoon crushed chicken bouillon cube
  • 1 teaspoon onion powder
  • 1 teaspoon garlic powder
  • 1 teaspoon cayenne pepper
  • 1/4 teaspoon cumin

Directions:

  1. In a bowl, mix all the ingredients together.  I find that mixing it with a balloon whisk helps mix it properly and more efficiently.  Set a fifth of the powder aside to make barbecue sauce.
  2. Rub as much of the dry rub as you can onto the meat.  You can cook the meat as soon as you’ve finished rubbing the dry rub onto it, or for better flavour, leave it wrapped in cling film overnight in the fridge.
  3. Place the meat in a roasting tin and cover with foil.  Cook the meat in an oven preheated to 200°C for 15 minutes.
  4. After 15 minutes, turn down the heat to 150°C.  Cook at 150 for 4 ½ hours.  For the last 30 minutes, turn up the oven to 200°C and remove the foil and cook the meat uncovered.
  5. Allow the meat to rest covered with foil for 20-30 minutes before slicing.

SlowroastPork2

Yelly Eats

Pork shanks for dinner

There is a Filipino dish called humba (hoom-ba) which I absolutely love.  My mum used to make it on Saturdays because my dad was teaching and would be away.  My dad is Jewish so we try to avoid eating pork when he is at home.  Because he teaches at graduate school on Saturdays and is away for most of the day, Saturday would be pork day.  My mum makes the most amazing pork chops and just thinking about them now is making my tummy rumble!

I am pleased to say that I can now cook humba and it’s a favourite because the cut of pork is one of the cheapest.  I love buying pork hocks and pork shanks because they’re so cheap and you get so much meat from them.  Humba has dried banana blossoms which can be purloined from oriental supermarkets.  When I cook humba I am transported to the Philippines and I am once again in my mum’s kitchen waiting for her to put the humba on the table (although I must say that my mum’s humba is still the best and my version of it pales in comparison!).

I went to the supermarket yesterday and found pork shanks.  I am someone who can’t resist a food bargain so I bought the pork shanks thinking I had banana blossoms at home.  I thought I was due another humba session.  But as I inspected my cupboard, I discovered that it didn’t have the banana blossoms that I thought were languishing behind cans of chopped tomatoes.  So after a little creative thinking, I thought if I cooked the pork shanks in tomatoes, it would work.  So I brought down a couple of cans of chopped tomatoes, I chopped onions, brought out the frozen chopped garlic, hunted my dried bay leaves down, and chopped up what was salvageable from the celery that I bought nearly 2 weeks ago!

I had my fingers crossed for how my little concoction would turn out and I was quite pleased at the flavour.  The base flavour was based on a Filipino dish called afritada which starts with sautéeing garlic, onions and tomatoes.  Because the pork was cooked slowly, the pork was meltingly soft.  Good things come to those who wait and slow cooking this was definitely worth the wait!  It was great served over couscous but would be great over rice or mashed potatoes too!  If you fancy trying the recipe, here it is:

Ingredients:pork shanks1

  • 1kg pork shanks (not deboned)
  • 2 400g cans of chopped tomatoes
  • 1 large onion chopped
  • 3 celery stalks chopped
  • 2 heaped teaspoons of chopped garlic
  • 2 dried bay leaves
  • ½ teaspoon paprika
  • ½ teaspoon cumin
  • 500-750 ml water
  • 1 pork broth cube
  • salt and pepper to taste
  • 1 tablespoon olive oil

Directions:

  1. In a large stock pot, heat the oil and sautee onions.  When the onions are slightly transluscent, add the chopped tomatoes, garlic, celery, broth cube, spices and the bay leaves.  Allow to simmer.
  2. Add the pork shanks and enough water to cover the pork shanks.  Cover and cook on low heat for 1 hour, turning pork shanks occasionally so that the skin doesn’t catch on the stock pot bottom.
  3. When the meat is soft enough, take the shanks out of the pot and debone them and return the meat pieces into the tomato sauce and cook for a further hour on low heat.  The deboning is optional but it will make it easier to eat later on and you can remove the skin if you want to make it less fatty.   Add salt and pepper to taste.
  4. When you are ready to serve, you can opt to slice the pork pieces into bite sized pieces.

pork shanks2


Yelly Eats

Ube!

I’m working on an ube sponge cake recipe because I miss ube cake from the Philippines.  I particularly love the ube cake from Red Ribbon.  But because Red Ribbon hasn’t made it to this side of the Atlantic, I will just have to learn to make the cake myself.  I’ve always said that necessity is the mother of invention and it is absolutely necessary for me to have my ube cake fix!  I haven’t had a slice of ube cake since…I can’t remember.  It must have been over 5 years!

My first attempt seemed to go down pretty well.  The colour was great and the flavour was absolutely there.  The cake was spongy and light.

purple yam cake batter

I will have to make it again maybe next week (after the cake that’s currently residing in my cake box has been consumed).  I’ve got recipe improvements in my head already.  I’m sure the oriental store in Chelmsford will enjoy the fact that I’ll be buying another jar of ube jam next week!  Watch this space for the recipe soon!

Ube cake at last!


Yelly Eats

Spinach and bacon quiche

It’s quite the wintry day today and I couldn’t really be bothered to cook anything too complicated for lunch.  Hence the quiche.  I could, in theory, make my own puff pastry.  But the whole point of making a quiche this afternoon was that it was going to be quick and comforting.

This has been quite successful so I’m quite happy to share it.

Spinach and bacon

Ingredients:

  • 320g shop bought puff pastry sheet
  • 260g spinach
  • 250g bacon (about 6-8 rashers)
  • 1 medium sized onion, minced
  • 2 cloves garlic crushed and minced finely
  • 150ml single cream
  • 4 eggs
  • 1 tablespoon olive oil (or 10g butter)
  • 100g grated mature cheddar (or Monterey Jack)

Directions:

  1. Preheat oven to 180°C.
  2. Unroll pastry and lay over a 25cm loosed based round flan tin.  Once the flan tin is lined, put back in the fridge while you prepare the filling.
  3. In a sautee pan, heat up olive oil and add minced onions and sautee.  Once onions turn transluscent, add garlic.  Stirfry the garlic and add the bacon. Once bacon is golden brown, add the spinach and cover to wilt the spinach.  This should take about 2 minutes.  Once spinach is wilted, give the mixture a gentle stir.  Put the lid back, take of the hob and set aside.
  4. In a mixing bowl beat eggs well and add single cream. Spoon 1/3 of the spinach and bacon mixture into the cream and egg mixture to temper the eggs.  Mix well and then add the rest of the spinach mixture.
  5. Bring out the pastry-lined flan tin and fill the pastry with the spinach-milk and egg mixture.  Top with the grated cheese.
  6. Bake in the oven for 35-40 minutes or until the cheese is golden brown.
  7. TIP:  To avoid the now infamous “soggy bottom” and because you are putting in quite a liquid mixture and a soggy bottom is almost inevitable, I find that putting in a baking sheet in the oven while it’s preheating will help the soggy bottom from not being too soggy.  Once you’re ready to bake the quiche, just slight the flan tin onto the baking sheet.
Yelly Eats

The taro project!

I went through a phase of craving bubble tea.  Bubble tea is a tea-based drink very popular in Taiwan and its Asian neighbours (there is a milk tea/bubble tea revolution in the Philippines, if my friends’ Facebook and Twitter photos are to be believed!).  If you’ve never had bubble tea (where have you been?), think your typical cup of tea mixed with a milk shake (it’s served cold) with tapioca pearls sucked through a big, fat straw.  There is a myriad of flavours but my favourite is the taro milk tea (in the Philippines, I used to have mine with taro pudding which is basically taro jelly).   And since most of the bubble tea bars are in London, I had to find a way to satisfy my craving.  It wouldn’t have been financially responsible to run down to London everytime I had a bubble tea craving.  So I bought taro milk tea powder, the straws, oolong tea and the tapioca pearls.

The taro milk tea powder comes in 1kg bags so after a few sessions of taro milk tea indulging, I still had more than half a bag of the taro powder!  So I had the brainwave of making a taro-flavoured chiffon cake.  It was all an experiment so I wasn’t sure it would work.  After the mixture was put together and I put it in the angel food cake pan, I looked at it with a lot of trepidation!  The colour wasn’t as deep as I wanted it to be so I was VERY worried!

taro chiffon1

But after the baking time, it came out and it was quite the yummy and light little thing.  It’s still a bit unstable (probably owing to underbeating the egg whites!) and I want a deeper taro flavour, but it was a good start.  What surprised me most is how the colour deepened as the cake baked!  I’m looking forward to tweaking the recipe and having it come out all lovely and lilac!

Watch this space!

taro chiffon2

Yelly Eats

Tea loaf!

I’ve been meaning to make a tea loaf for ages.  I fell in love with the Yorkshire Tea Loaf that used to be available in the supermarkets (there are other tea loaf brands but I did love the Yorkshire Tea loaf the best).  Apparently, it was no longer cost effective to produce the cake.  I think I’m not the only person who was absolutely gutted to no longer find this particular cake brand on the supermarket shelves.  They had a very good thing going and it’s very sad that they chose to pull the product instead of resize it.  Resizing the loaf would have been more acceptable to consumers like me who loved their cakes!

I have been getting over a lingering bout with a certain nasty virus but today has been a really good day (albeit the cotton-woolly head still).  It’s quite a good thing because I do want to go back to work and I’ve taken too much time off work for my peace of mind!  I thought I’d try my hand at a new recipe today.  Mind you, I did bake custard creams yesterday for the first time and they turned out great.  As a personal rule, I don’t necessarily bake when I’m not 100% because I kind of feel like your food reflects your well-being so I think that if I’m not in the best of moods or health, my food reflects it.

I may have overbeaten the batter a bit too much which might explain why the cake is a bit too crumbly.  But the taste is wonderful.  I may have to tweak the recipe according to my preference because I do love a dense tea loaf.  I got the fruity tea loaf recipe from the Good Food website.  They call it a tea cake, but I’ve always thought a teacake is a marshmallow on a biscuit covered with chocolate!  I’ve always trusted the recipes on there, I’m sure a few tweaks to fit personal taste is welcomed!  After all, we’re all allowed to make food our own as we are going to eat it! 🙂

As exercise go, I think my first tea loaf went well.  I think it might work with my no-fail loaf base.  I will probably work on the tea loaf recipe again soon.  Which is good because I’ve still got dried fruit and mixed peel left!

My first ever tea loaf!

Yelly Eats

Custard creams!

Cooking and baking has become a way for me to reconnect with the food that I loved to eat in the Philippines.  Since moving to the UK, I’ve had to rely on my food prep skills instead of having my mum cook my favourite dishes for me.  I’ve always loved it and cooking and baking were my creative outlets.  It always made me smile when people said that something I made was really good.  But when I was in the Philippines, cooking and baking the dishes I wanted to prepare was more frustrating than relaxing because I couldn’t get a lot of the ingredients that I needed.

Things have changed though since I moved to England.  I can now attempt most of the recipes that I’ve been wanting to try because the ingredients are more accessible (it’s the Southeast Asian ingredients that are now not as accessible as they were in the Philippines! Ha!).  As a result, my cookbook collection has grown to a 32-strong contingent!

This year, the resolve is to actually USE my cookbooks and cook or bake 1 recipe a weekend.  A Passion For Baking by Jo Wheatley

I decided to start with a custard cream recipe from Jo Wheatley’s book A Passion For Baking.   I’ve been reading a lot of good things on Twitter and Facebook about Jo’s recipes.  Jo Wheatley was the winner of the second season of the Great British Bake Off.  I must admit that it was because of the GBBO shows that I took up baking again.  Before that I would just bake the occasional cake or cupcake but now I’ve been reading up on baking techniques and expanding my baking repertoire.

Jo’s custard cream recipe is great.  She breaks the down in stages and the preparation instructions are easy to follow.  I had to chill my cookie dough though for about 30 minutes instead of the suggested 20.  As each oven is different, I baked my biscuits for 15 minutes instead of the prescribed 10-12.  They weren’t golden enough.  But once out of the oven, they smelled heavenly and the biscuits were lovely and short!  What I loved the most is that the recipe page is laid out in two columns.  One column has ingredients and the suggested equipment that lets you prepare them before you start baking.  The other column has the preparation directions.  It was so lovely and organised!  I try to be organised in the kitchen becaused I think the trick to cooking and baking well is being organised.

My cookies are lovely and golden and what I appreciate most is that it doesn’t have as much sugar as I thought it would.  Being a diabetic means that I have to limit my sweet treat moments and unfortunately for me, custard creams are a guilty pleasure.  Maybe now I can develop a custard cream recipe that is more diabetic-friendly!  But the best bit of the recipe is that it makes about 20 biscuits which makes 10 custard creams.  They are moreish but at least there isn’t a lot scoff down!  Ha!

Custard creams

Yelly Eats

Stollen from scratch!

So the goal for the holidays, really, was to make stollen from scratch.  I made stollen once before, but it was from a Mary Berry mix.  Everything was prepped for me so all I had to do was mix everything up.  I was determined to find a recipe I could follow that was as close to Mary Berry’s as possible.  I searched for a stollen recipe but suprisingly couldn’t find one in my numerous books (to be completely honest, I didn’t really look very far!  Ha!).  But as luck would have it, Edd Kimber’s book Say It With Cake has a wonderful recipe for stollen.

Stollen proofing

I added a little tidbit:  I soaked the dried fruits in brandy overnight.  Makes for an interesting taste.  It called for nuts in the recipe, but I didn’t have any to put in so I did without that.  And because I like my marzipan spread through out the bread instead of in a big lump in the middle, I rolled my marzipan flat so that it would be distributed throughout the loaf.

Stollen baked

I was quite surprised at the size of the stollen though.  It came out bigger than I thought!  But it did look so pretty when it was dusted with icing sugar!

Stollen dusted

I was quite pleased with how it’s turned out.  The stollen came out beautifully!  Am now not too afraid to make breads, aided of course by my Kenwood chef (obviously not paid advertisement, although, I would love it if Kenwood took notice and gave me free stuff!  Ha!).   I wanted to learn how to make stollen mostly because of my dad.  He talks about the time when his entire family lived in Vienna and stollen eventually filters into the conversation.  It has always been a dream to bake something that reminded my father of happy times with his parents and siblings.  A few more practice sessions so that I can develop my own take on stollen!  But until then, Edd Kimber’s recipe with my own tweaks to it will do me just fine!

Stollen

Yelly Eats

Turkey hash anyone?

The turkey we bought could have easily fed 10 people (or so it says on the packaging!).  So our tiny fridge is filled to the brim with leftover turkey and the trimmings: roasted potatoes, carrots and parsnips, steamed brussel sprouts and lots of beautiful gravy (I say beautiful because all the skin and bones from the chicken thighs purchased in the past have been languishing in my freezer for the sole purpose of making amazing gravy for Christmas!  The gravy was in a word BEAUTIFUL!).  I’ve made a beautiful turkey and leek pie from the leftover stuff before but my favourite leftover standby recipe really is turkey hash.  This is definitely a no-brainer.

You simply dice the leftover turkey meat, potatoes, carrots and parsnips and slice the brussel sprouts in half.  Dice a large onion and you’re ready to go.  Heat a couple of tablespoons of oil (olive or vegetable, it doesn’t really matter) and sauté the onions until they are transluscent.  Add the turkey meat and stirfry until the meat is heated through.  Add the chopped vegetables and stirfry until the vegetables are heated through.  Add a cup of frozen peas, although this is optional.  Pour about 2 cups of gravy (if you have it, although one cup will do beautifully).  Stir until the gravy is mixed through properly.  Salt and pepper to taste.  I add a liberal sprinkling of tabasco sauce to add a kick to the hash.  I think the spicy tabasco sauce helps kickstart you the morning after a healthy helping (or two) of Christmas Day feasting.  Cook for a further 10 minutes until everything is piping hot and serve.

It might not be a pretty dish but it certainly is a tasty and brilliant way to use up leftover turkey, roasted veg and gravy!

Turkey hash

Yelly Eats

Food for the gods, a Filipino tradition

I grew up enjoying food for the gods during Christmas and I always thought that it would be such a complicated recipe because, well, at the time, you couldn’t exactly buy the ingredients from your local supermarket.  It was such a treat when people gave us a box of these lovely sweet treats and I remember when we were handed one each after dinner so that we could make it last.  This was before my Lolo Ani opened a bakery and started baking these in huge quantities and we had food for the gods on tap every Christmas!

Food for the gods are really date and walnut bars.  I don’t really know why they’re called food for the gods, maybe because they are scrummy and so wonderfully to eat!  I’ve tried several recipes and after a few tweaking exercises, I may have cracked it.

I brought this to work today so that I could share it with my officemates.  I am merely continuing the Filipino tradition of giving away food for the gods at Christmas!

Here’s my recipe:Food for the gods aka date bars

Ingredients:

150g all purpose flour
1 teaspoon baking powder
1/4 teaspoon salt
2 eggs
225g brown sugar
125g unsalted butter, melted
150g walnuts, coarsely chopped
150g dates, coarsley chopped

Directions:

  1. Preheat the oven to 175°C.
  2. In a mixing bowl, mix flour, salt and baking powder together with a balloon whisk until well combined.  Add walnuts and dates and mix with a spatula until the dates and nuts are well-covered with the flour mixture and well-distributed within the flour mixture.  Doing this will ensure that the dates and the nuts do not sink to the bottom of the mixture.
  3. In a mixing bowl (am using a free standing mixer but you can also do this by hand with a balloon whisk), combine melted butter and sugars and beat until the mixture is smooth and almost creamy.  Add the eggs one at a time, making sure that the egg is well-combined before adding the next one.  Add the flour-date-nut mixture in quarters.  Mix until everything is well-distributed and you cannot see any flour.
  4. Spread mixture in a greased 17.5cm x 26.5cm (or thereabouts) pan lined with baking parchment (I learned that lining the baking pan with parchment is good because it makes it easy to release the cake from the pan) and bake for 30-35 minutes or until a toothpick inserted comes out clean.  This recipe makes up to 24 squares.