Yelly Writes

Thoughts of Lent

I grew up going to church every Sunday.  I will even go as far as to say that I have 2 home churches, one that I grew up in and one where I grew up spiritually in.  I went to Sunday school.  I sang in the children’s choir.  I eventually taught Sunday school and daily vacation church school.  My summers were spent in church and I was there nearly everyday!  I sang in the church chancel choir and completely immersed myself in all the church activities.  I spent so much time in church that I think it would be natural for me to miss church at Easter.

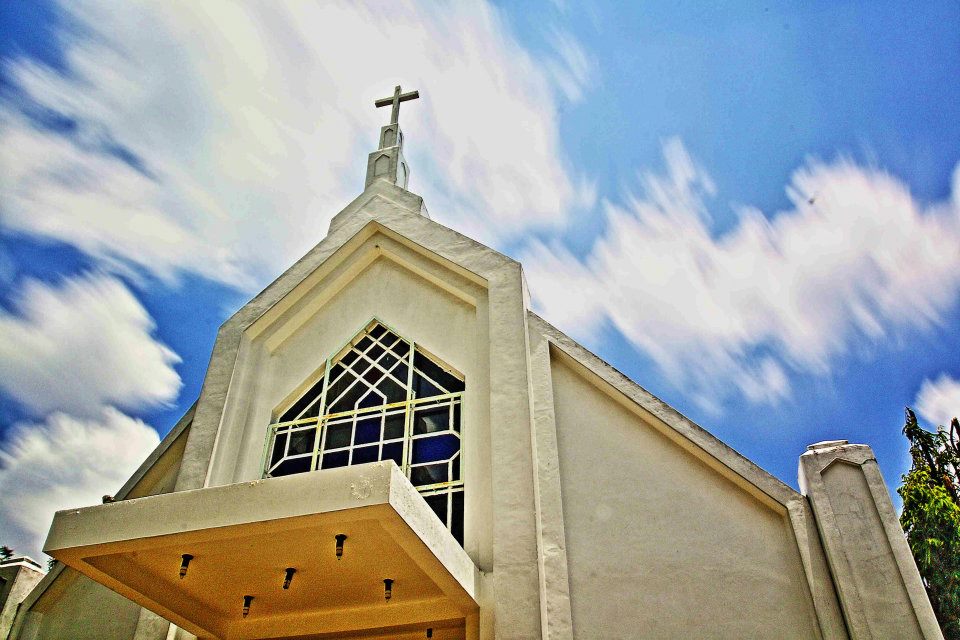
I think it’s fair to say that Easter is one of the busiest weeks in the Christian calendar, apart from Christmas.  Funnily enough, there is a Filipino term (Pasko ng Pagkabuhay) which translated means Christmas of the Resurrection.  We start counting down to this week from Ash Wednesday.  But it all starts unfolding on Palm Sunday, when Christians celebrate Jesus’ triumphant entry into Jerusalem with a Palm Sunday service.  The Catholics in the Philippines have their beautifully woven palm fronds blessed in church and they display this in their homes, mostly on their windows.  I grew up in a Methodist church and while we didn’t have the blessing of palm fronds, children of the Sunday school class came into the church waving their palms to re-enact Jesus’ triumphant entry.  This Sunday also marks the beginning of a very busy week.

I remember choir rehearsals in earnest because we would be singing during a series of services.  Our church usually had a service for the last supper where we would have the washing of the feet ceremony.  Our minister and members of the church would recreate the moment when Jesus washed his disciples’ feet in a display of his humility and servanthood.  We would have a communion service to commemorate the last time Jesus broke bread with his followers before his death and when he foretold of Judas’ betrayal.

One service that is closest to my heart is the Seven Last Words on Good Friday.  We start off the service at one o’clock in the afternoon.  We have seven speakers, a mixture of lay members and ministers, all speaking about the biblical basis of Jesus’ seven last statements.  Interspersed with the short sermons are songs by the choir.  The choir chronicles the last 24 hours of Jesus’ life with songs commemorating the kiss in the Garden of Gethsemane, Jesus’ journey carrying the cross through the Via Dolorosa, His nailing on the cross, His message to His disciple entrusting his mother into his care and His subsequent surrender of His spirit and His life into His Father’s hands.  Each song that we sings makes the hairs on the back of my neck stand on end because all the songs just underline the great sacrifice that The Lord undertook to save the world.  And because the songs paint a picture of how it was to be there, it just shakes me down to my foundations.  What it must have felt to be there!

We usually finish at three o’clock which is popularly believed to be the time of his death.  After all the speakers have finished their messages, and the choir have sung all their songs, the church is stripped as a sign of mourning.  Because Christ is dead and we are bereft without His divine presence.

Black Saturday is usually celebrated in silence, in contemplation.  Nothing really happens on a Saturday.  But the choir does try to sneak in a few hours of practice because we do have a sunrise service and an Easter Sunday service to sing in.

Easter Sunday is celebrated in so many ways.  But my favourite is a sunrise start.  We have an Easter sunrise service where messages of hope, joy and salvation resound in the sermons and the songs from the choir.  As a Christian, it is lovely to greet the brand new rays of the sun with the reassurance that Christ is not dead, He is alive and sitting at His Father’s right hand and waiting to come back for all of us.  We have an Easter Sunday service (yes, after the sunrise service, which is usually an ecumenical service with all the Christian churches in our community) that finishes with a lovely (and very traditional) Easter egg hunt for the children.

While I will enjoy the odd chocolate bunny and the occasional chocolate egg, and enjoy the bank holiday and the respite from the rat race,  the reason for the season will always resonate in my heart.  I will always know that Easter is the celebration of Christ’s resurrection, Christ’s ascension to heaven.  It is the fulfillment of the promises in the Bible.

Easter will always bring me hope, joy and a wonderful reminder of my salvation by Christ, but I will always feel a twinge in my heart because I will be missing my church family and the fellowship of Christians that I grew up with.  It is always wonderful to celebrate the fulfillment of God’s promises with like-minded individuals.

Fairview Park United Methodist Church - photo credit: Matt de Guzman
Fairview Park United Methodist Church – photo credit: Matt de Guzman
Yelly Eats

The Breakfast Club tribute pancakes

It’s supposed to be Spring.  The sun is supposed to be out.  The weather should be warming up.  But Mother Nature didn’t seem to get the memo.  It is snowing almost everywhere in the UK today.

I’ve been craving The Breakfast Club‘s HamSoEggcited for some reason.  I think it was because of the weather and the fact that I wasn’t feeling very well (I’ve got a bad cold, if anyone’s interested in offering tea and sympathy!).  In my head, HamSoEggcited would cure all my ills.  I had visions of lovely fluffy pancakes, melting cheese sandwiched in ham slices and a perfectly fried sunny side up egg with the yolk all gooey and runny!

HamSoEggcited - The Breakfast Club

But because London wasn’t exactly a hop, skip and jump away, I thought I’d try to replicate it in my tiny kitchen.  I found a great recipe for fluffy pancakes recently and tweaked it so that the pancakes were how I wanted them to be.  I had gammon ham in the fridge and cheese that needed using up so I set about recreating the sweet-savoury pancake stack.

My recipe for fluffy pancakes is below:

Ingredients:Fluffy pancakes

  • 135g self-raising flour
  • 1 tsp baking powder
  • ½ tsp salt
  • 3 tbsp caster sugar
  • 150ml milk
  • 1 large egg, lightly beaten
  • 30ml melted butter or olive oil
  • butter to cook pancakes

Directions:

  1. Combine the flour, baking powder, salt and sugar in a large bowl with a balloon whisk (I love using a balloon whisk to mix dry ingredients because it does it really quickly and really well!).
  2. In a jug, whisk the egg and milk together.  Then add the olive oil.
  3. Combine the flour mixture and the egg-milk mixture and beat until you have a smooth batter.  If there are any lumps, this should disappear soon with a little more mixing.  Let the batter stand for a few minutes.
  4. Heat a non-stick frying pan over medium heat and add a knob of butter and swivel the butter around to coat the pan, until all the butter has melted.  Add a ladle of the batter to the pan.  The batter will be thick, but don’t worry because this is how the batter should be.  Wait for the pancake to bubble and for the bubbles to burst.  Loosen the edges with a fish slice and flip over.  Cook until both sides are slightly golden brown.  The pancake should rise to about 1 cm thick.
  5. Repeat until all the batter is used up.  This makes 4 large pancakes.  I know that might not sound like much but a stack of 2 pancakes are more than generous for one person!
  6. Serve with lashings of syrup of your choice, and extra butter if you are so inclined!

To make the HamSoExcited, I kept each pancake warm in a low oven and each time I made a pancake, I stacked it with a folded piece of gammon with a slice of cheese inside (the gammon).  I did a stack of 3 pancakes and doused the pancakes (VERY liberally) with golden syrup (because I’d run out of maple syrup).  Leaving the pancakes in the oven while I cooked the eggs gave the pancakes a little crunch.  When I placed the fried egg over the pancake stack I had to take a photo because it was soooooo pretty.  Probably not as pretty as The Breakfast Club’s HamSoEggcited but it was close enough, I thought.  It certainly tasted like it!

tribute pancakes

I posted the photo on Instagram and the people managing The Breakfast Club’s instagram account thought it was a pretty impressive effort!

TheBrekkyClubComment

Yelly Eats

Remembering The Cavendish

It was horribly busy at work today and tomorrow is going to be an even longer day.  It’s Budget Day tomorrow and the firm I work for has a post budget presentation for its clients.  Tomorrow will be a long day because we’ll be prepping materials for the presentations.

Ah well!  I’m in my happy place though because I’m still thinking about last Tuesday when I had afternoon tea at The Cavendish.

I’d never been to The Cavendish but it was easy enough to get to because it was right behind Fortnum and Mason.  The hotel was understated but it was quietly elegant.

We gave our names at bar concierge and I felt fairly special as we were made to feel like they were expecting us.  We were led to a quite corner of the Lounge Bar and were given menus so we could choose our teas.Tea - Afternoon Tea at The Cavendish

Afternoon Tea at The Cavendish is from 2 to 5PM everyday and they charge £18 per person.  This includes a pot of tea for each person, a selection of finger sandwiches: Wicks Manor smoked ham with whole grain mustard, egg mayonnaise with rocket salad, Scottish smoked salmon with cucumber and cream cheese, and cheddar cheese and pickle; a selection of pastries, tartlets and chocolate truffles and scones with jam and clotted cream.  The £18 also includes a glass of champagne but I opted for the non-alcoholic option of passion fruit juice.

Passionfruit Juice - Afternoon Tea at The Cavendish

On the menu it looked like a substantial amount of food but I wasn’t prepared for the amount of food that was brought to the table.  It was a LOT!  We ordered afternoon tea for two people but the food that was brought to the table could have easily fed four people very generously.

Sandwiches - Afternoon Tea at The Cavendish

I loved the service because the staff were wonderfully friendly and attentive.  We were looked after well.  I appreciated the fact that they offered to refill our teapots with hot water.  The teapots held about two cups worth of tea and water costs next to nothing, but not ever establishment will offer to refill your teapot.  I loved that about the Cavendish.  While it is expected for most establishments to offer a non-alcoholic option, not every place does.  We were given a lot of options to replace our glasses of champagne and I must say, the passion fruit juice that I had was wonderfully fresh!

Scones Jam Cream - Afternoon Tea at The Cavendish

When the afternoon tea tray was brought to the table, it was brought to us with a slight flourish and the waiter explained the contents of each plate.  There were 2 scones for each person with large pots filled with delicious clotted cream and lovely jam.  There were more than enough sandwiches which were generously filled.  I love smoked salmon and the sandwiches were stuffed to bursting!  You certainly get what you pay for and more!

Am now looking at my calendar and planning my next visit!

The sweet element was the mini cakes, tartlets and chocolate truffles and they were lovely!  They were cute, individual pieces and very beautifully made.

Sweet treats - Afternoon Tea at The Cavendish

At one point during the meal, I certainly worried about not being able to finish the food (we couldn’t manage it in the end) because there was so much of it.  I would definitely recommend having afternoon tea at The Cavendish.  The venue is quiet and has the element of privacy even though the space is quite open plan.  You get wonderfully attentive service from the staff and the food is definitely value for money.

I’m certainly looking forward to the next visit!

Yelly Writes

Good vibes!

Today wasn’t such a good day because I am currently in the throes of quite a bad migraine episode.  The pain meds are fading and I’m due to drink my next round of painkillers.

I wanted to share this photo with y’all though because I thought it was such a positive little slogan that it won’t fail to make you smile.  This was taken outside the Spitalfields branch of The Breakfast Club.  They used to have this note on their receipts but for some reason the last receipt I got from them didn’t have this little cheerful tidbit.  I guess they thought having the sign outside the shop would be enough.  And, in my case, it was enough; and on the day that I saw that sign it was certainly a good day!

Good vibes sent out into the cosmos and all that!  Even if you start the day with a pounding headache or even if something negative manages to wiggle itself into the start of your day, if you tell yourself that you’re going to have a good day, you are.  Don’t let the negativity get you done!

If you tell yourself you’re going to have a good day, you are!

Today is going to be a good day!

Yelly Writes

Thank you!

I must say that I am quite pleased whenever someone comes to visit the blog.

I know it’ll sound cheesy when I say this: but I am always challenged to write better when people come to visit.  It’s all about the quality of the posts, really.  It’s all about content.  And every time someone likes a post, or starts following the blog, it reminds me that I have a responsibility to the people who follow the blog: to write better, to post better photos and to share something relevant.

I started the blog because I wanted to embrace the fact that I am all about the food.  But I’m beginning to realise that whilst food might be the centre of my writing universe, it’s not the be-all-and-end-all of my writing world.  I started with a tag line on the blog that said “There is no love more sincerer than the love of food.”  I took my food posts from a previous blog and brought them over to this blog.  But I soon realised that concentrating on food did not allow me to express all my thoughts.  Sure, it’s good to have a niche blog, but  I have opinions and I have thoughts that I most certainly love sharing–mostly, selfishly, so that I can validation; that I can say that I’m not the only one with these thoughts.  It’s good to get validation and it’s even better when someone you don’t know in some other part of the world says, “Yeah, I think that too!”

If you’ve dropped by the blog, if you’ve liked a post, if you’ve clicked that button to follow the blog, let me just say “Thank you!” for without y’all to spur me on, I don’t think I’d put my thoughts out there!

This is my second thank you post, but I feel the need to say it over and over again.  You all make my heart sing (insert Dido’s Thank You song here)! 🙂

Thank you!

Yelly Eats

Coffee and walnut brownies

I am doing something yummy for money!

Our office is doing a week-long bake sale to raise money for Comic Relief.  Comic Relief is a charity based in the UK that was set up in 1985 that aims to raise money to tackle the root causes of poverty and social injustice.  The money that gets raised each year helps so many people and I enjoy doing my bit to contribute, albeit in a very small way.

I’m going to bring coffee and walnut brownies tomorrow.  It’s still chocolate but it’s got a distinct coffee taste that cuts through the chocolate quite nicely, or at least, I think so!  I love the recipe enough to share it.  I think this would be great with a cup of milky tea or, what else, coffee!  If you try the recipe, please tell me what you think!  I’d love the feedback.

Ingredients:Coffee and walnut brownies cooling
200g dark chocolate, roughly chopped
175g butter
25g instant coffee granules
200g caster sugar
125g brown sugar
150g plain flour
100g walnuts, roughly chopped
3 eggs

Directions:

  1. Preheat oven to 170°C.
  2. Prepare a baking tray by greasing and lining with parchment paper and set aside.  I learned that when you grease the baking tin that you plan to use, it’s a good thing to also grease the parchment paper you line the baking tin with.  It prevents the parchment from sticking to the cakes and makes for easy removal.
  3. In a bowl, mix flour and choppped walnuts together, making sure that the walnuts are completely coated in flour.
  4. Place chocolate, butter and instant coffee granules in a heat-proof bowl over a sauce pan of simmering water.  Leave until melted completely but making sure you stir once or twice to make sure that everything is combined properly.  Remove from the heat once everything is melted completely and well-incorporated.
  5. In a free-standing mixer (this can also be done by hand or a hand-held mixer), mix sugars and egg and beat until the mixture is smooth and fluffy-looking.  I read somewhere that this usually takes about 5 minutes, but what I look out for is a change in colour, the batter becomes a paler shade of what you when you started to cream the sugars.  Pour chocolate mixture slowly into egg and sugar mixture and mix until everything is well-combined.  Add the flour and walnut mixture and mix until the batter is thick and smooth.
  6. Spoon the mixture into the prepared baking tray and bake in the preheated oven for 30-35 minutes, until a skewer inserted comes out clean.  The top will look shiny and flaky.  Be careful not to over cook as the brownie can become hard and very chewy.
  7. This can make up to 24 squares, depending on how large your slices are.

Coffee and walnut brownies

Yelly Eats

Mango Love!

Presenting (finally) the recipe for Mango Love!

I created this recipe to enter the Emerald Street Cupcake Challenge.  While I didn’t make the shortlist (I was disappointed, but I knew my recipe was more tropical than American), the whole process of creating and designing a cupcake was a very enjoyable and very delicious one!

This lovely golden cupcake is offers you a burst of tropical mango sunshine.  The twists of lime in the sponge, frosting and mango jelly are added to bring out the mango flavour.  The cupcake is moist and full of fruity mango sweetness.  The mango flavour theme continues in its golden yellow frosting.  It is topped with a heart-shaped mango jelly piece.  This luscious burst of tropical sunshine during the cold winter months that will have you reaching for another…and another!

Cupcake Sponge:P2100839
90g sugar
50g butter, unsalted
1 egg
180g flour
1/2 tsp baking powder
1/2 tsp bicarbonate of soda
1/4 tsp salt
200g mango pulp
2 tbsp lime juice

Frosting:
300g icing sugar
80g butter
1 1/2 tbps lime juice
40g mango pulp

Mango jelly (for decoration, optional):
50ml hot water
80g mango pulp
1 tbsp lime juice
15g granulated sugar
1 packet gelatin

Directions:

  1. Preheat oven to 180°C
  2. In a bowl, mix flour, baking powder, bicarbonate of soda and salt until well combined with a balloon whisk and set aside.  In a small bowl, mix together the mango pulp and lime juice.  Set aside.
  3. In a stand mixer, cream butter and sugar until this becomes fluffly and light yellow in colour.  About 5 minutes.  Add egg and mix until mixture is creamy.
  4. Add the flour mixture and mix until a heavy batter forms.  Add the mango pulp into the batter and mix for 5 minutes until the mango pulp is distributed well.  You may have to scrape the sides and the bottom of the bowl to make sure everything is well combined.
  5. Spoon into a lined muffin tin.  Makes 8 – 10 cupcakes.  Bake for 18-20 minutes or until a toothpick inserted in the centre comes out clean.
  6. To make the frosting, cream butter and the icing sugar together.  Add mango pulp and lime juice until the mixture is creamy.  Pipe onto cooled cupcakes.
  7. To make mango jelly for decoration, mix hot water with 1 packet of gelatin until gelatin is dissolved, mix in the sugar, mango pulp and lime.  Allow to set (leave for about 4 hours for it to set properly) and cut into cubes or shapes and use to top frosted cupcake

This recipe makes 10-12 cup cakes.

Mango Love cupcakes

Yelly Eats

Love my Mango Love!

Over a month ago, I saw an advert on The Stylist magazine about a cupcake competition.  The instructions were to create a cupcake made of a sponge cake base, frosting and decoration.  The prize was what attracted me the most: if you were in the top 5 finalists, you won a Kitchenaid artisan mixer, a copy of the new Hummingbird Bakery cookbook and the chance to attend a baking masterclass.  If you won, your cupcake would be sold in all the Hummingbird Bakery branches for 2 whole months.  To be honest, it was mostly the masterclass that I wanted to attend.  I wanted to attend classes so that I could improve my cupcake decorating skills.  They also said that you would learn baking skills at the masterclass and I was definitely up for that!  Any chance at increasing what I know about baking was a chance worth taking.  I already have a Kenwood chef so getting a Kitchenaid mixer would have been a wonderful bonus.

It was a cupcake challenge and I was definitely challenged!

I sat down and started reading up on flavours and looked at recipes.  I checked my baking notes and set about improving a cupcake recipe I already had.  I also knew that I had to create a flavour profile that was consistent with every bake.  So I tested and retested the recipe I had in my head and when I was happy with how the sponge tasted, I set about creating the frosting.  And slowly but surely, the cupcake that I imagined became not only an idea but a real, live cupcake!

I suppose I couldn’t have won the cupcake challenge because the brief was for the cupcake to embody Hummingbird Bakery’s American roots.  I think I was missing the Philippines and missing Philippine mangoes too much that it came out in the cupcake I created!  I called my cupcake Mango Love.  I said that the cupcake gave you a burst of tropical mango sunshine.  And it did!

I’m grateful for the experience, because it’s made me trust my baking instincts more.  I’m more confident about my baking and I know that my goal is now to constantly improve my baking.  This whole experience of putting together recipes and making sure the flavours were sound has encouraged me even more to bake and create.  I’m thankful to Hummingbird Bakery and to Emerald Street for issuing the challenge.  Even thought I didn’t win, when I look at the pictures I took of the cupcakes that I made, I still feel like, somehow, I won a prize.

The recipe will be up on the blog in the next few days! 🙂

Mango Love cupcakes

Yelly Eats

Easy-peasy cornbread V2!

I did a slow-cooked joint of pork on the weekend.  I haven’t used my dry rub recipe in ages and I thought it was time I did.  I dusted off the dry rub recipe and had a critical look at ingredients.  I did a little tweaking and the pork turned out even better than I remembered.  The barbecue sauce that was made out of the leftover barbecue rub tasted even better as well.

But the dry rub recipe wasn’t the only recipe that experienced a few tweaks.  When one does a slow roast with barbecue sauce, the best accompaniment is cornbread.  I looked at my original cornbread recipe and I thought the flavours needed enhancing.  The new recipe has a better sweet-salty balance and I love my cornbread slightly crumbly and this new tweak added the right amount of crumble to my cornbread.

Here’s the tweaked recipe:

Ingredients:Cornbread

  • 200g polenta (fine ground)
  • 150g all-purpose flour
  • 120g sugar
  • 1 tablespoon baking powder
  • 2 teaspoons salt
  • 280ml buttermilk
  • 80ml vegetable oil
  • 1 large egg

Directions:

  1. Preheat oven to 200C.
  2. Prepare 12 x 7.5 pan by lining with baking paper and greasing with butter and set aside.
  3. Mix polenta, flour, sugar, baking powder and salt in a mixing bowl with a balloon whisk until well-combined.  Set aside.
  4. Beat egg, milk and vegetable oil together until well-combined.  Add to polenta mixture in 3 parts.  Once liquid mixture and dry mixture has been mixed together completely, allow to sit for 30 minutes so that polenta can absorb the liquid.
  5. Place in oven and cook for 20-22 minutes, or until a skewer inserted comes out clean.
  6. This recipe makes 18-20 squares.


Yelly Eats

Cooking it slow and low!

My favourite American food shows are Man vs Food and Diners, Drive-ins and Dives.  Mainly because it gives me a lot of cooking ideas.  I think these 2 shows are entirely to blame for a phase I went through over  a year ago.  Mind you, I’m really glad that I went through this phase because I learned how to cook meats using a dry rub and I have my own recipe for a dry rub now.  I also learned the benefits of cooking meats low and slow – cooking them at a low temperature (about 130°C – 150°C) very slowly (at least 5 hours!).  This is excellent proof that good (and very tasty) things come to those who are patient!

Tonight, I dusted off my dry rub recipe (which is based on the Kentucky dry rub recipe) and cooked the pork shoulder that I bought yesterday (pork shoulder cuts were 50% off so I couldn’t resist buying it–I am a willing slave to food bargains!).  The recipe below will work for meats weighing between 1.75 – 2 kilograms and will work with pork and beef.

Ingredients:SlowroastPork1

  • 2 tablespoon cornflour
  • 1-2 teaspoons chili powder
  • 2 teaspoons salt
  • 2 teaspoons paprika
  • 4 tablespoons sugar
  • 3/4 teaspoon crushed chicken bouillon cube
  • 1 teaspoon onion powder
  • 1 teaspoon garlic powder
  • 1 teaspoon cayenne pepper
  • 1/4 teaspoon cumin

Directions:

  1. In a bowl, mix all the ingredients together.  I find that mixing it with a balloon whisk helps mix it properly and more efficiently.  Set a fifth of the powder aside to make barbecue sauce.
  2. Rub as much of the dry rub as you can onto the meat.  You can cook the meat as soon as you’ve finished rubbing the dry rub onto it, or for better flavour, leave it wrapped in cling film overnight in the fridge.
  3. Place the meat in a roasting tin and cover with foil.  Cook the meat in an oven preheated to 200°C for 15 minutes.
  4. After 15 minutes, turn down the heat to 150°C.  Cook at 150 for 4 ½ hours.  For the last 30 minutes, turn up the oven to 200°C and remove the foil and cook the meat uncovered.
  5. Allow the meat to rest covered with foil for 20-30 minutes before slicing.

SlowroastPork2